10-TypeScript精讲
码路教育 11/17/2001
# 一,TypeScript精讲
# 1,ts介绍
学习资源:
- ts官网,地址:https://www.typescriptlang.org/docs/
- 结合别人写的ts文章,找点赞数比较多的文章
- 最好的学习资源就是直接在ts环境中写项目
- ts语法非常多,没有必要全部掌握,在项目中用到的语法不多
- 对于ts相关的面试题,需要背一点八股文
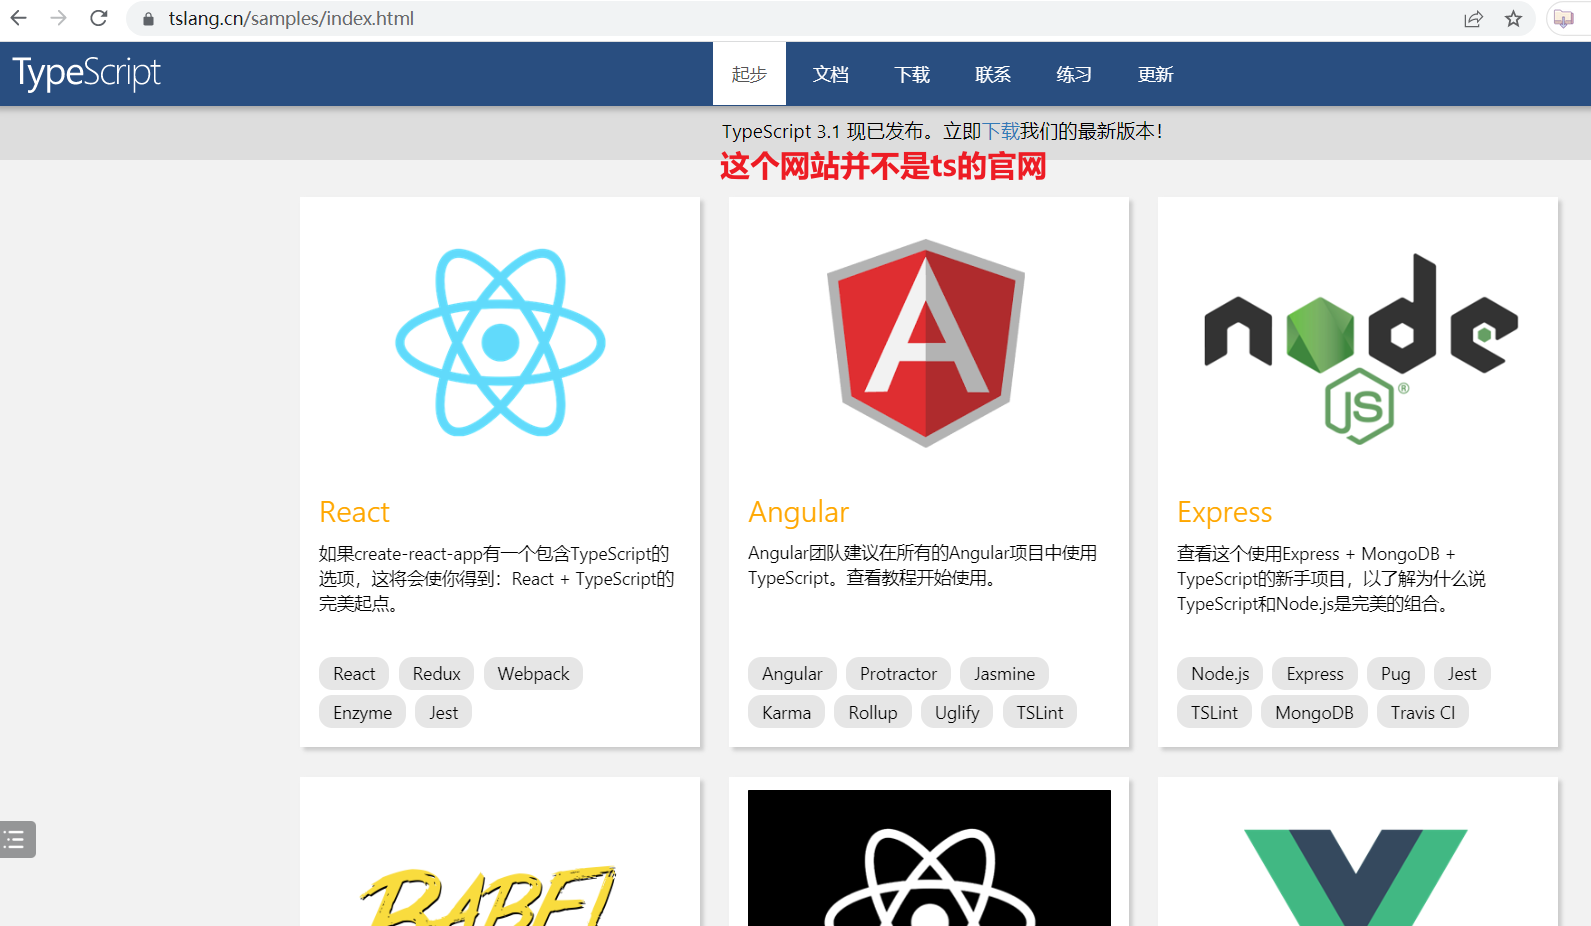
不要看ts中文手册:https://www.tslang.cn/docs/home.html
ts中的内容:
- ts类型,项目中必用,必须掌握
- ts面向对象编程,项目中基本上用不到
ts有什么好处:
- 在编译代码时,就可以找到错误,避免项目上线运行时产生bug
- ts代码的提示相当给力
ts应用场景:
- Angular源码在很早就使用TypeScript来进行了重写,并且开发Angular也需要掌握TypeScript;
- Vue3源码也采用了TypeScript进行重写,在阅读源码时你会看到大量TypeScript的语法;
- 包括目前已经变成最流行的编辑器VSCode也是使用TypeScript来完成的;
- 包括在React中已经使用的ant-design的UI库,也大量使用TypeScript来编写;
- 目前公司非常流行Vue3+TypeScript、React+TypeScript的开发模式;
- 包括小程序开发,也是支持TypeScript的;
# 2,学习哪些内容
ts中的类型:
- stirng
- number
- boolean
- any
- void
- 元组
- 枚举
- Array
- interface 自定义数据类型
- type 是给类型起别名,仅仅是一个别名
- 泛型
- 函数类型 const Fn: FC=(props: FnProps)=>{}
ts相关的环境:
- @types/* 如:@types/axios 是axios的类型说明文件
- *.d.ts 自己书写的声明文件
- tsconfig.json ts的配置文件,如果不懂,不要动,动之前,百度一下
- vscode 对ts支持非常好,也提供了一些配置,这些配置也不要动
ts报错解决相关:
- 在使用正确的类型
- 用any
- 明面上创建的是ts项目,只需要把后缀变成js,就需要添加类型约束,改成js后,vscode就不会检测类型
注意:
- 能之前我们写的js代码添加类型约束,会导致代码变的非常多
- 在工作,先把业务写完,再尝试添加类型约束
- ts代码刚开始不要想写的非常健壮,不报错就行
- 在真实开发中使用ts最多的两个场景:1)给props添加类型约束 2)约束后端
# 3,学习ts中的类型
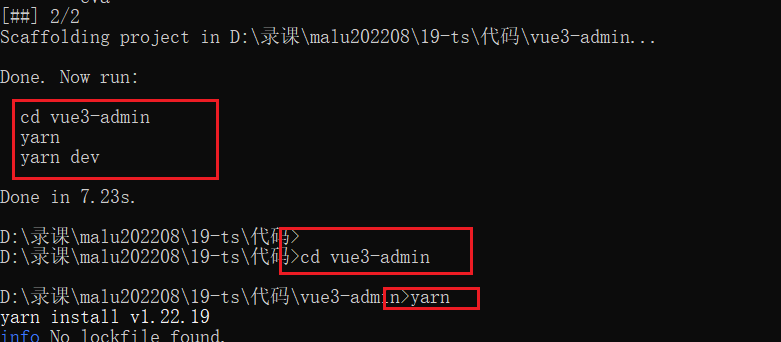
创建一个基本vue3的项目,如下:
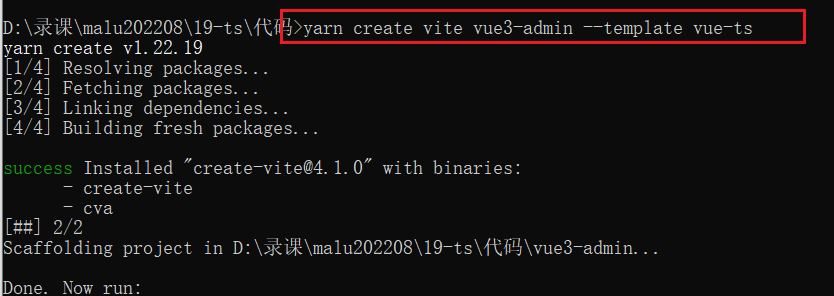
进入,安装依赖,如下:
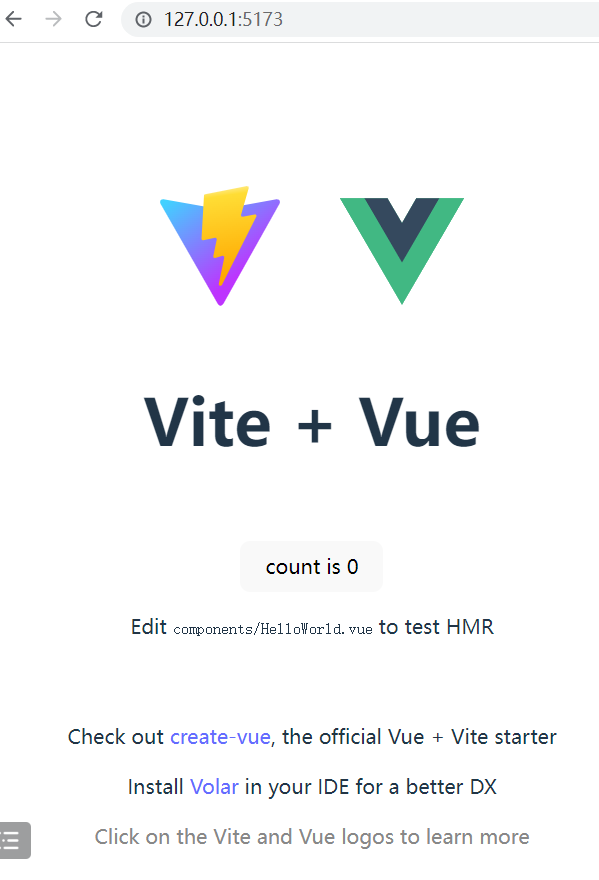
运行项目,如下:
# 1)number

# 2)string

# 3)boolean

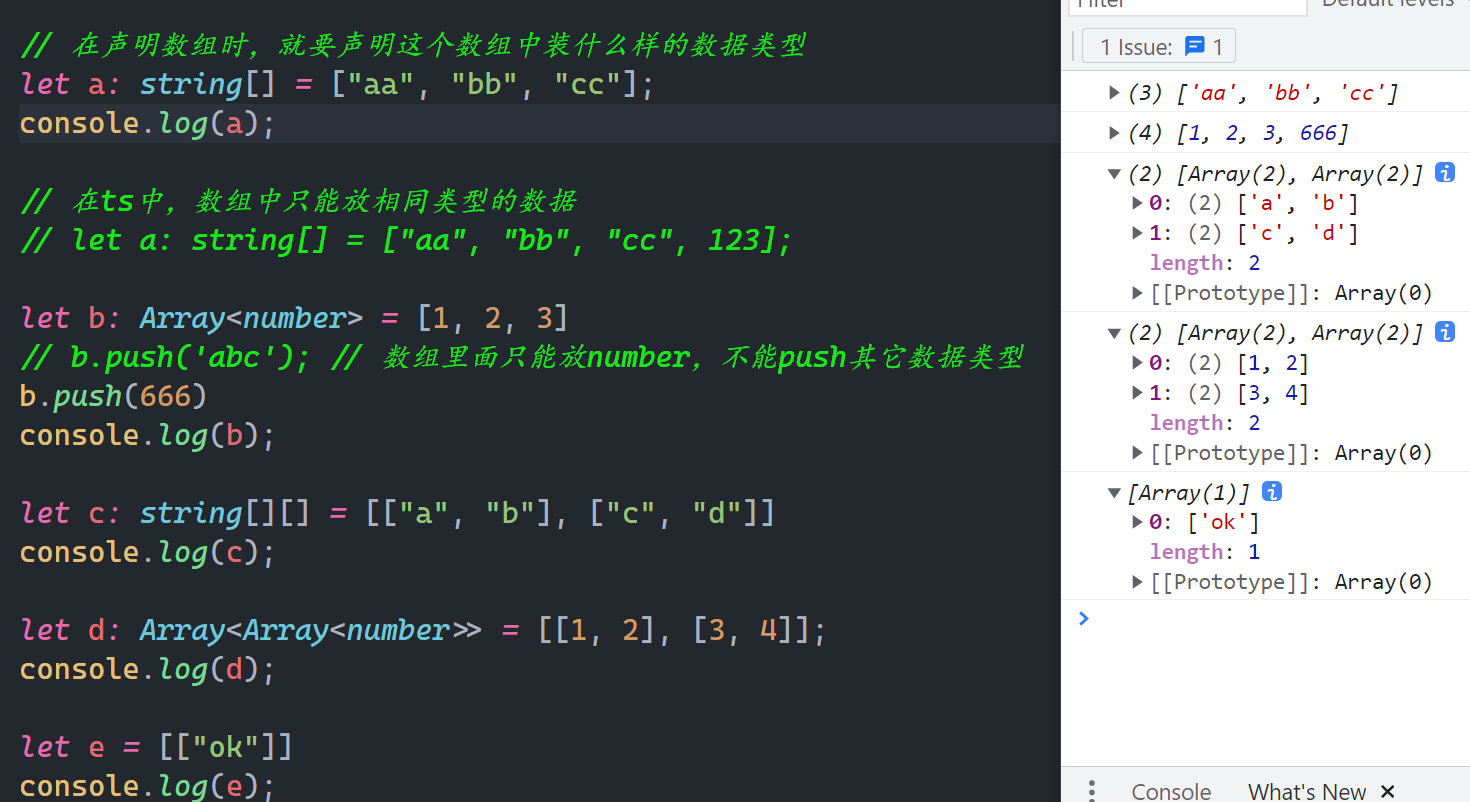
# 4)数组
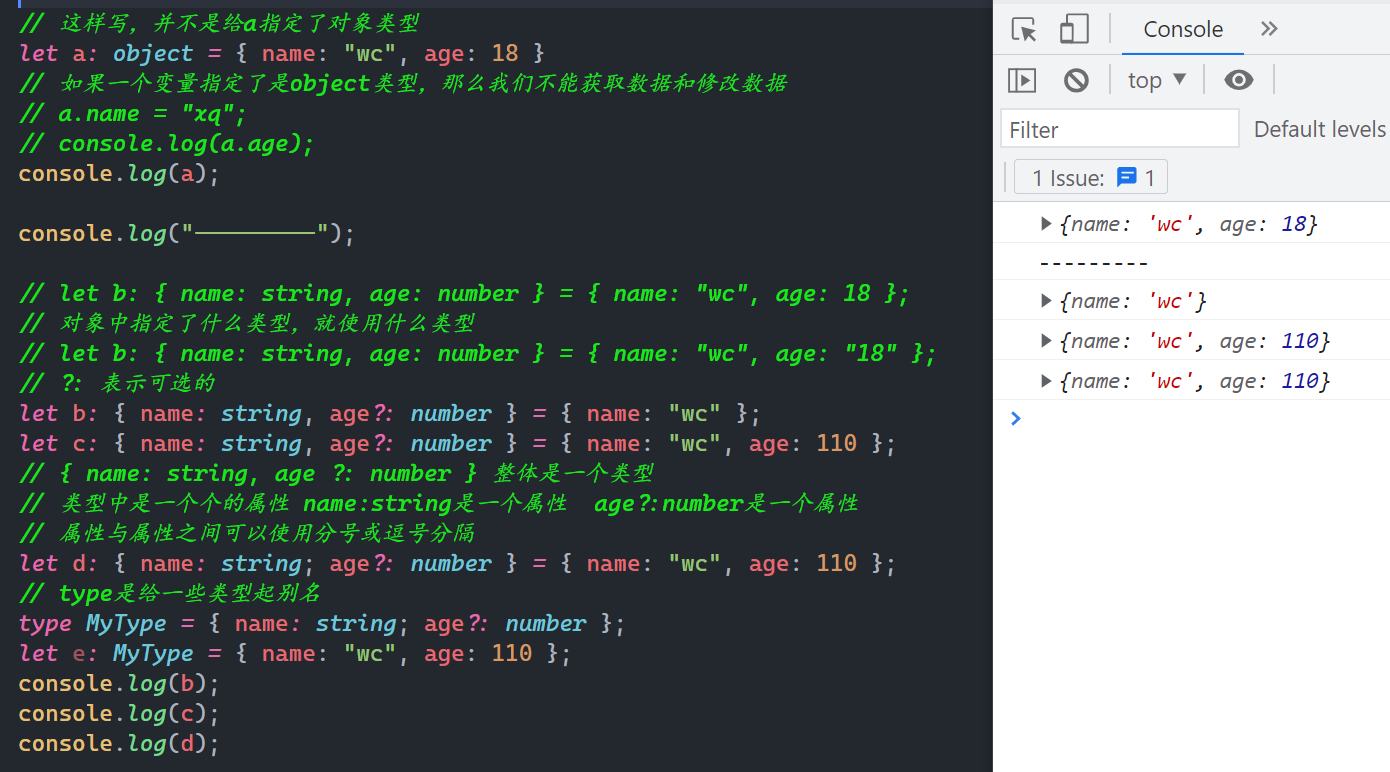
# 5)对象类型
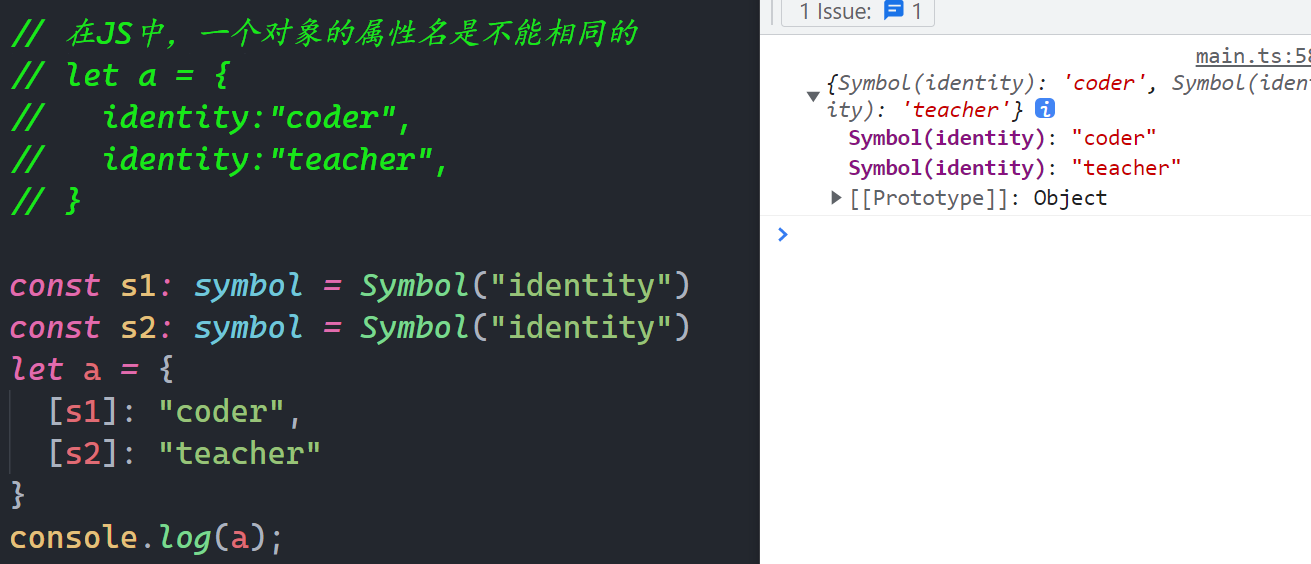
# 6)Symbol
# 7)null和undefined

# 8)any

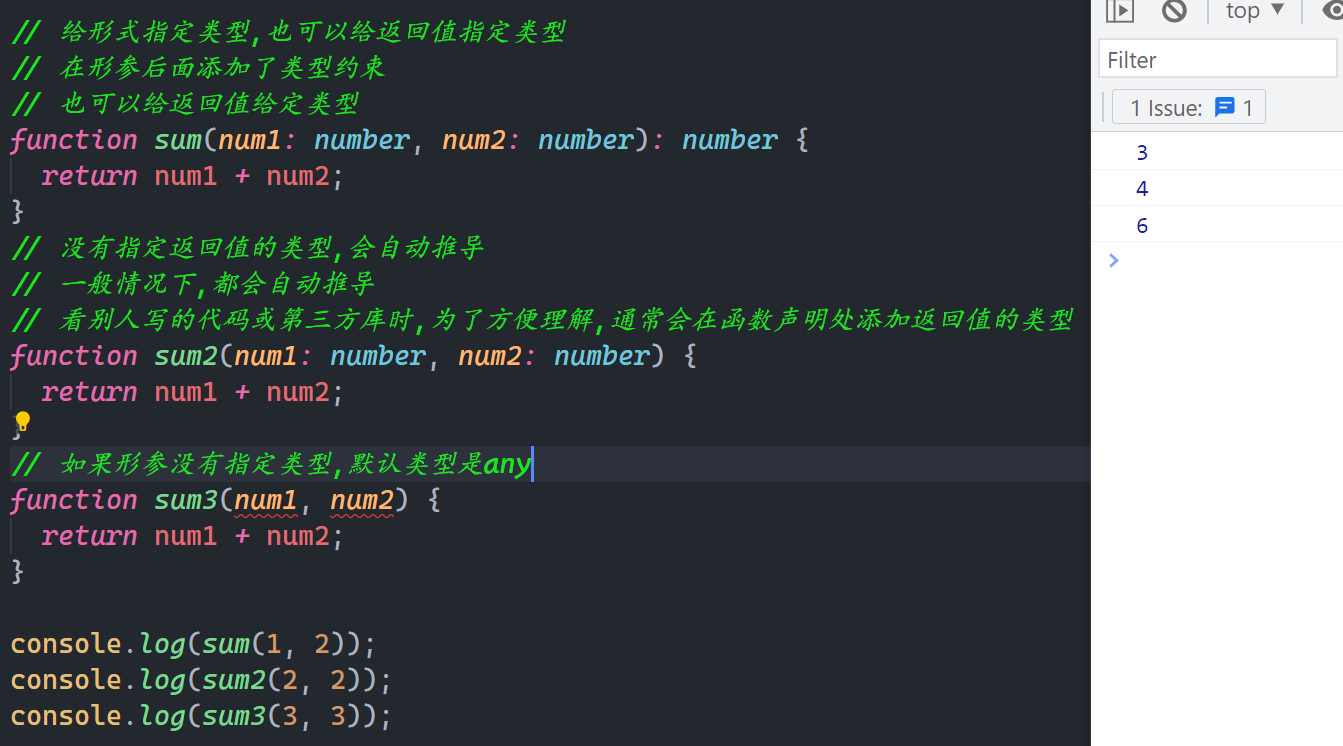
# 9)形参类型和返回类型

# 10)void

# 11)元组

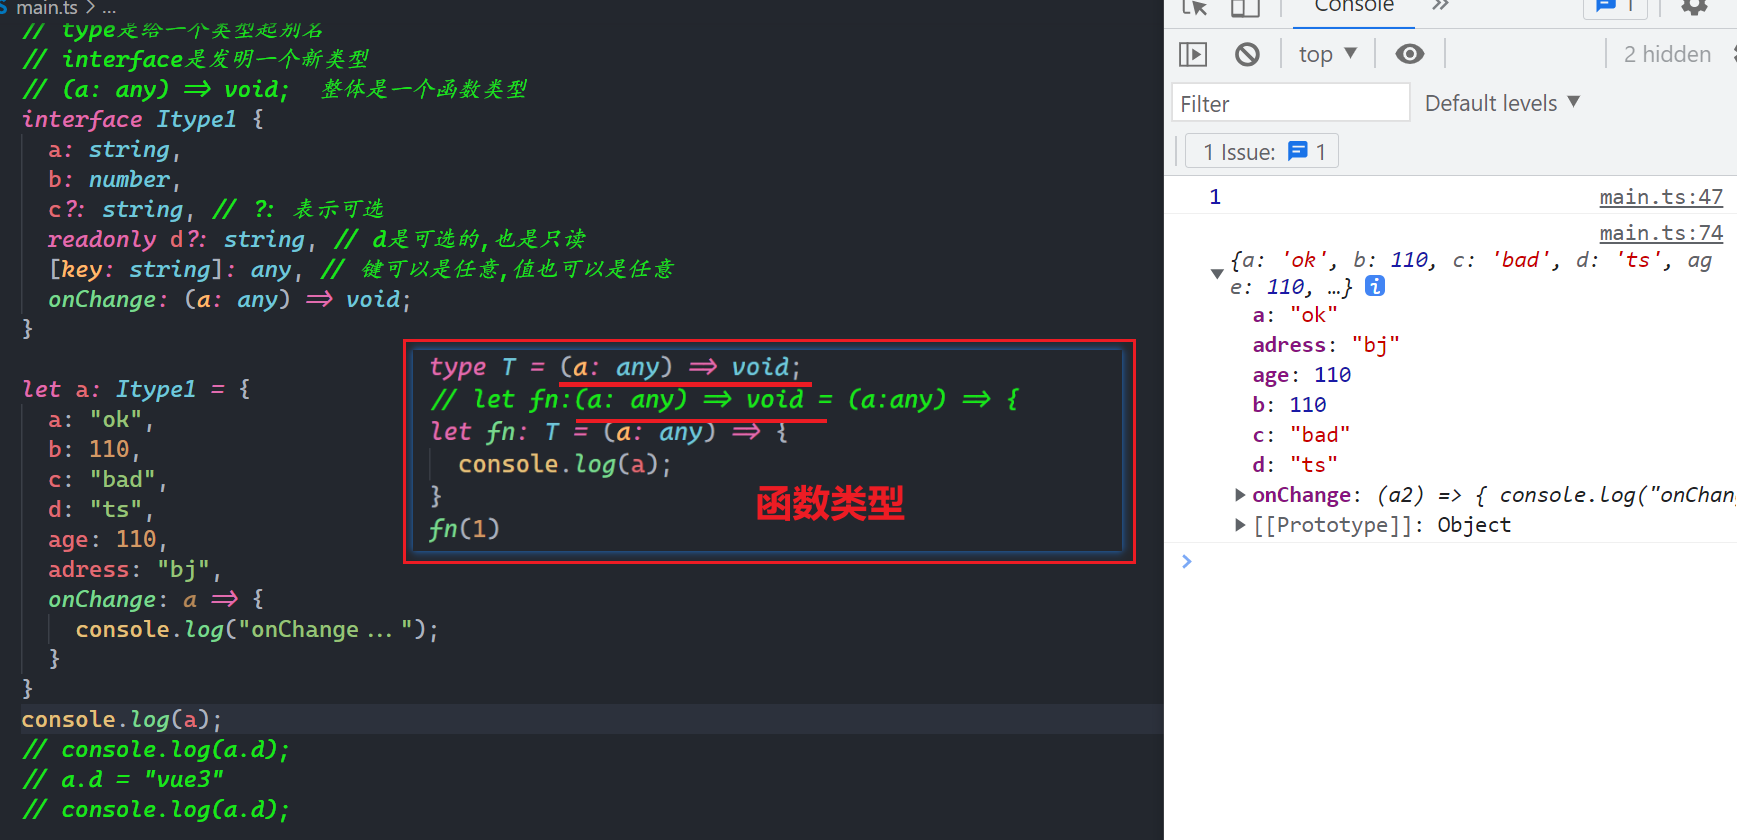
# 12)自定义类型
说白了,自已发明类型,通过interface来发明。interface就是用来自定义类型的。
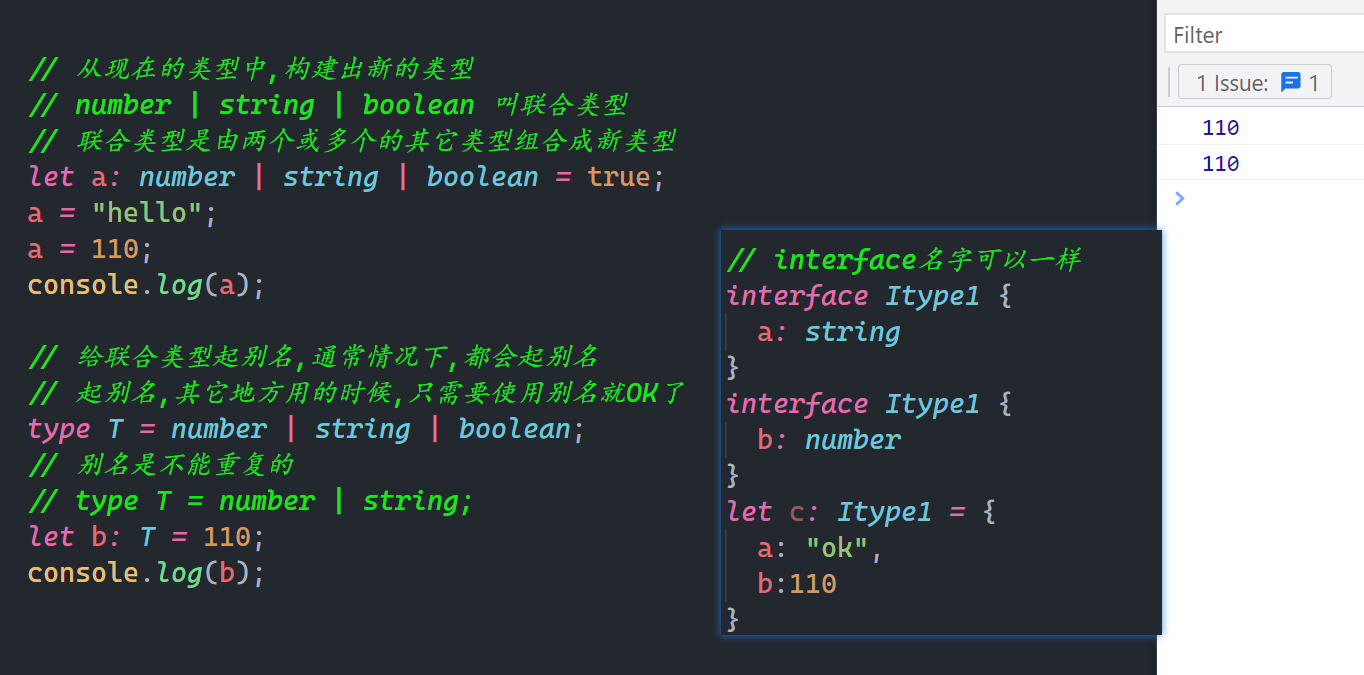
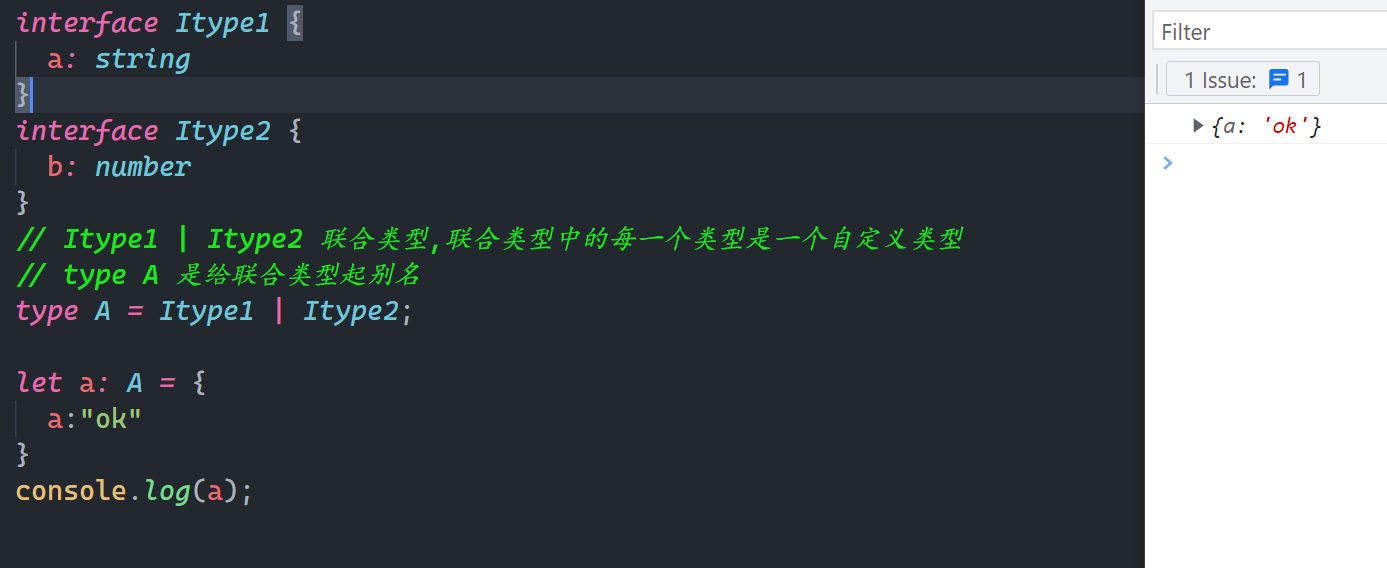
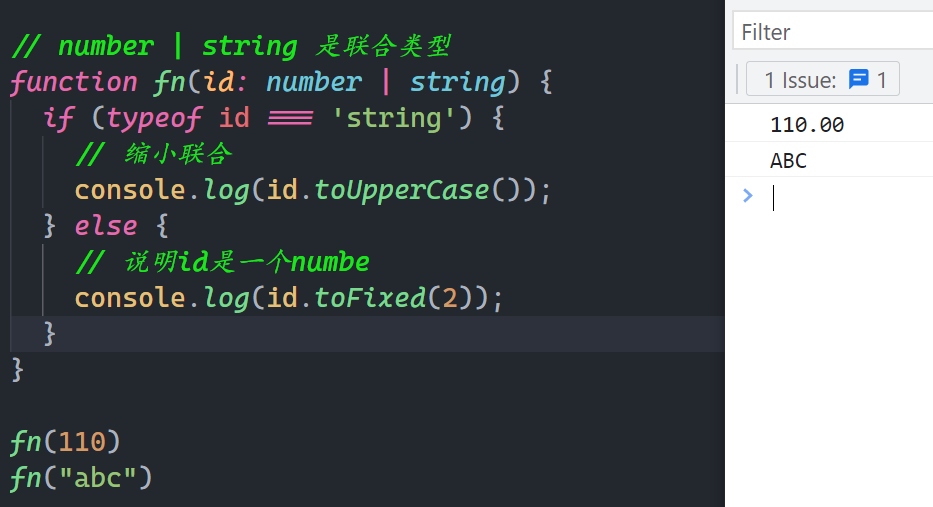
# 13)联合类型
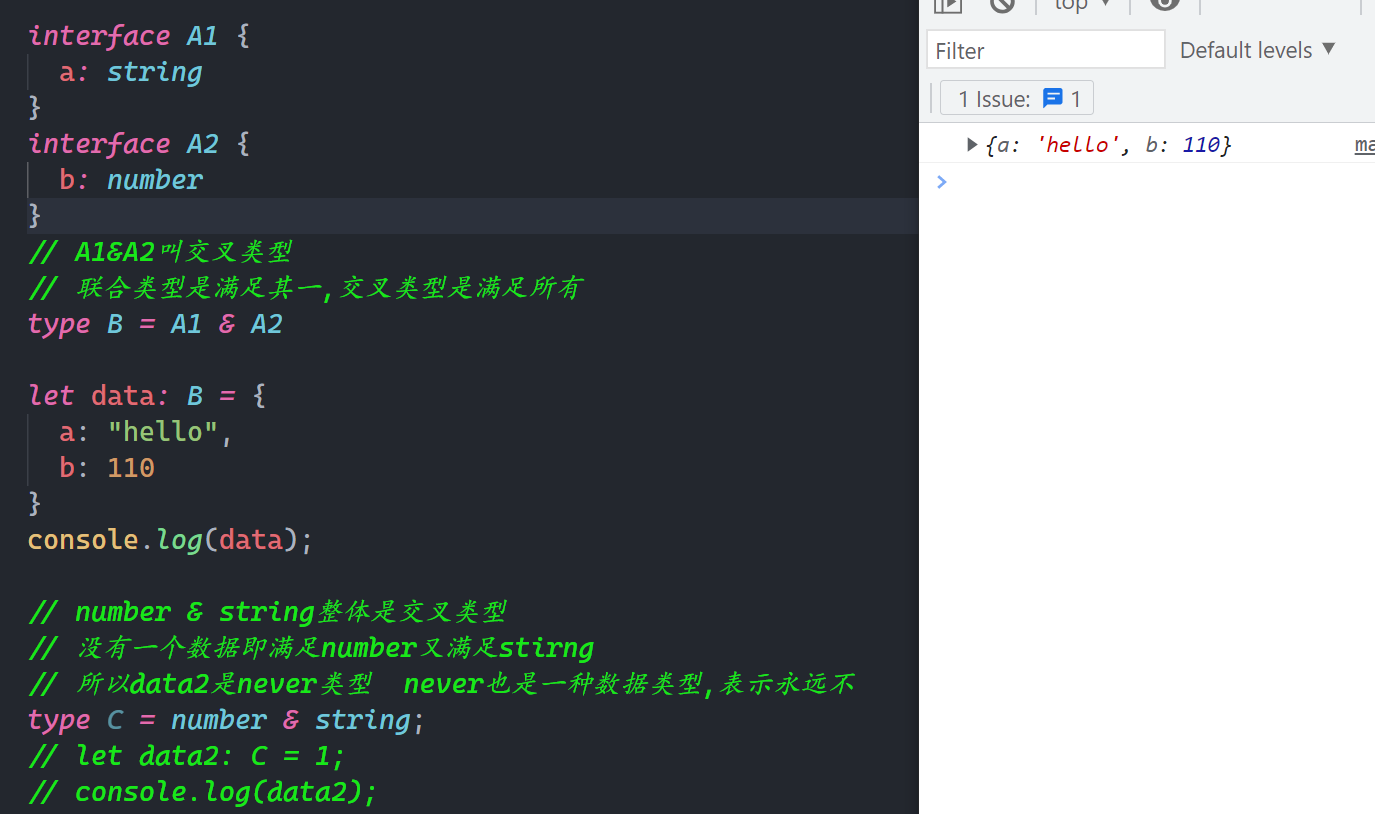
# 14)交叉类型
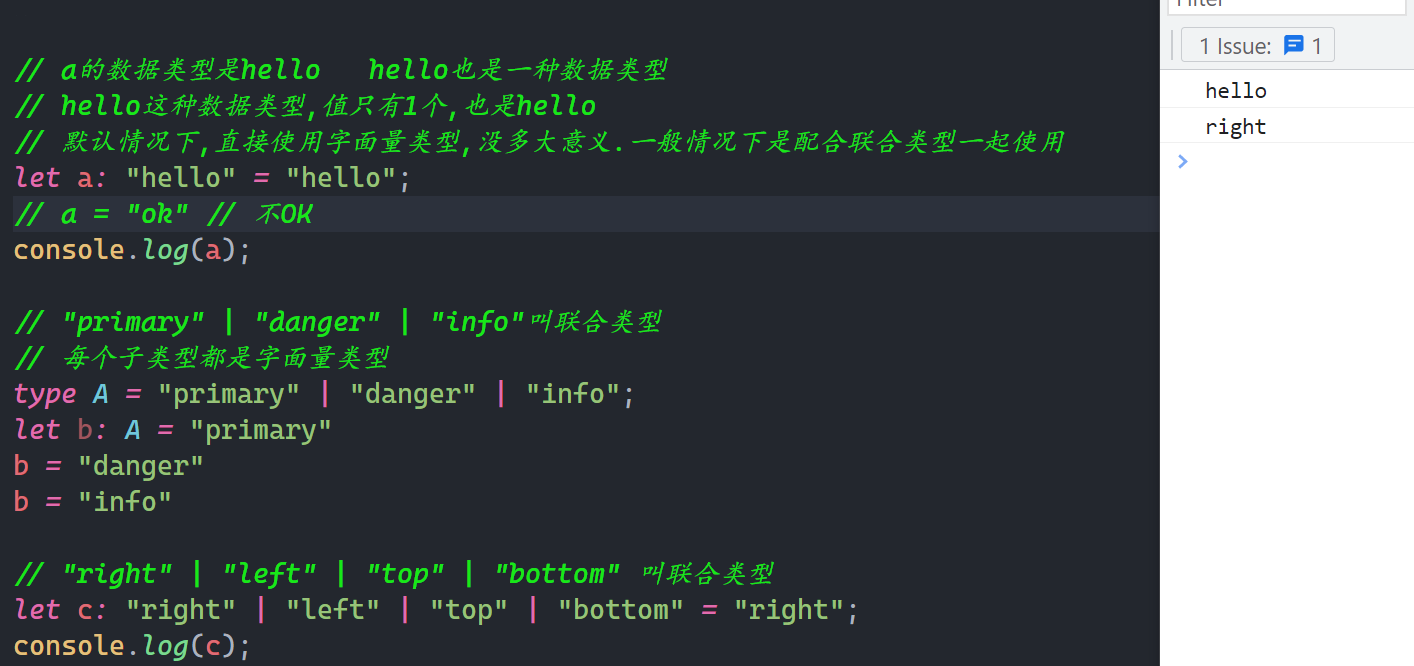
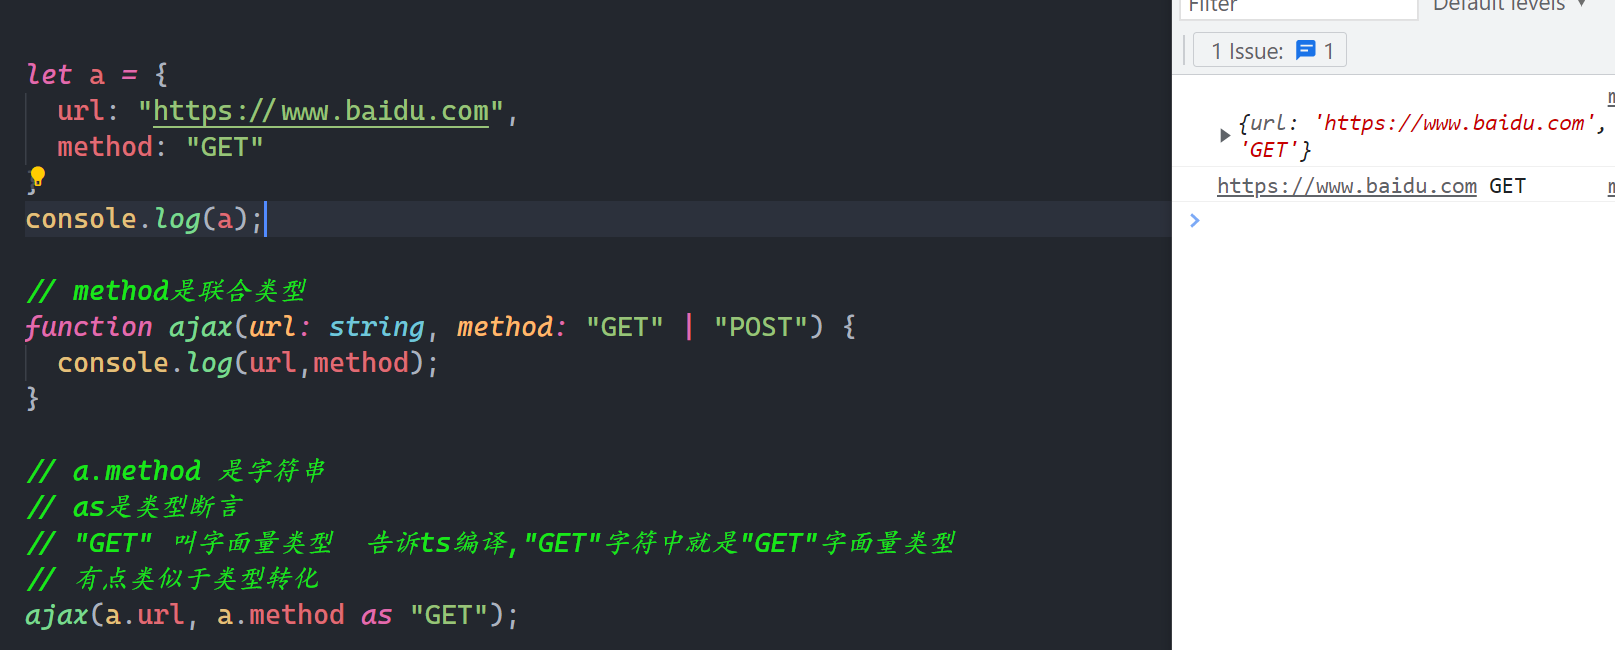
# 15)字面量类型
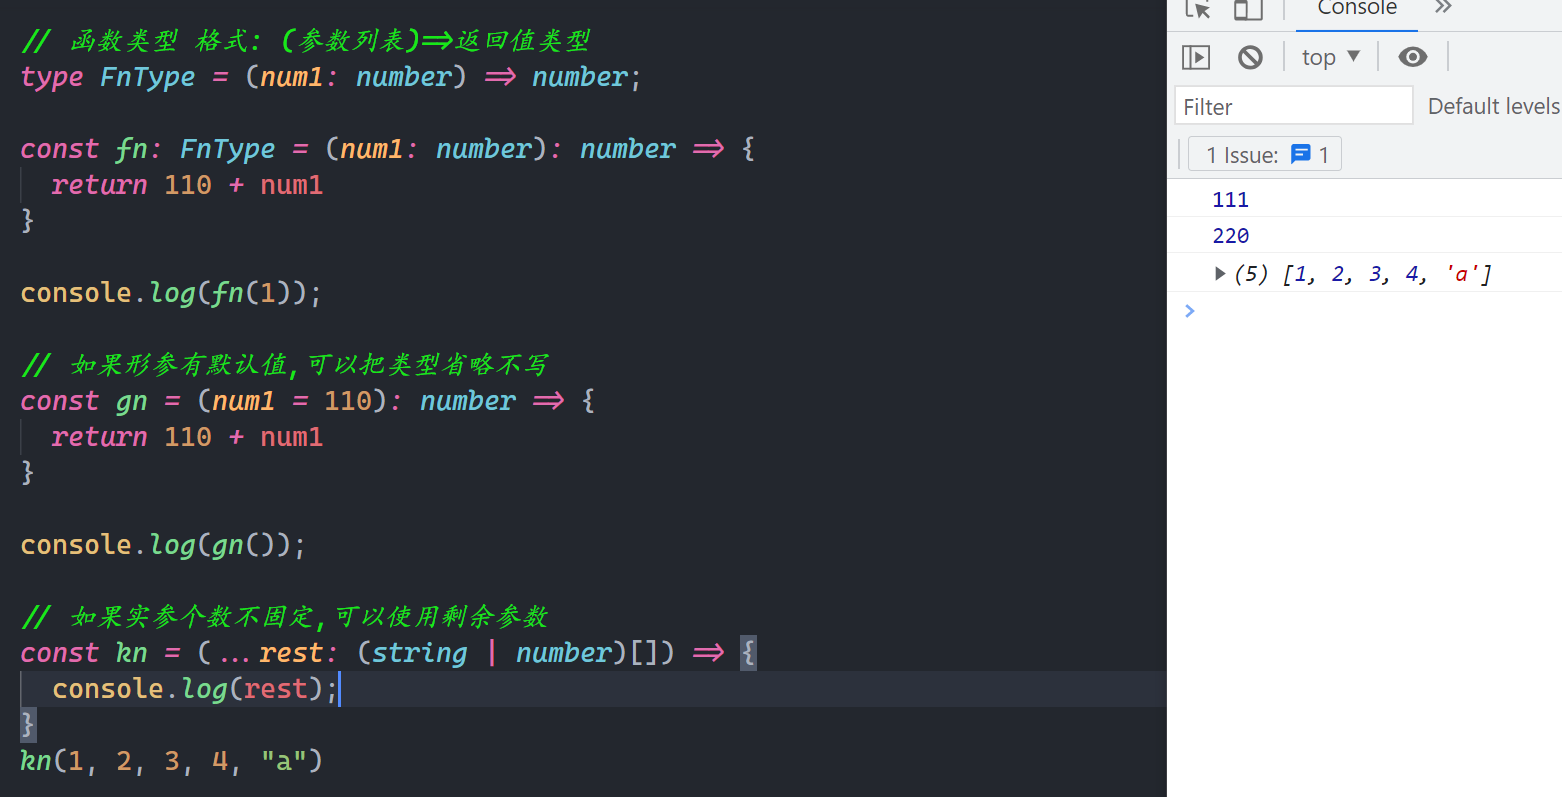
# 16)函数类型
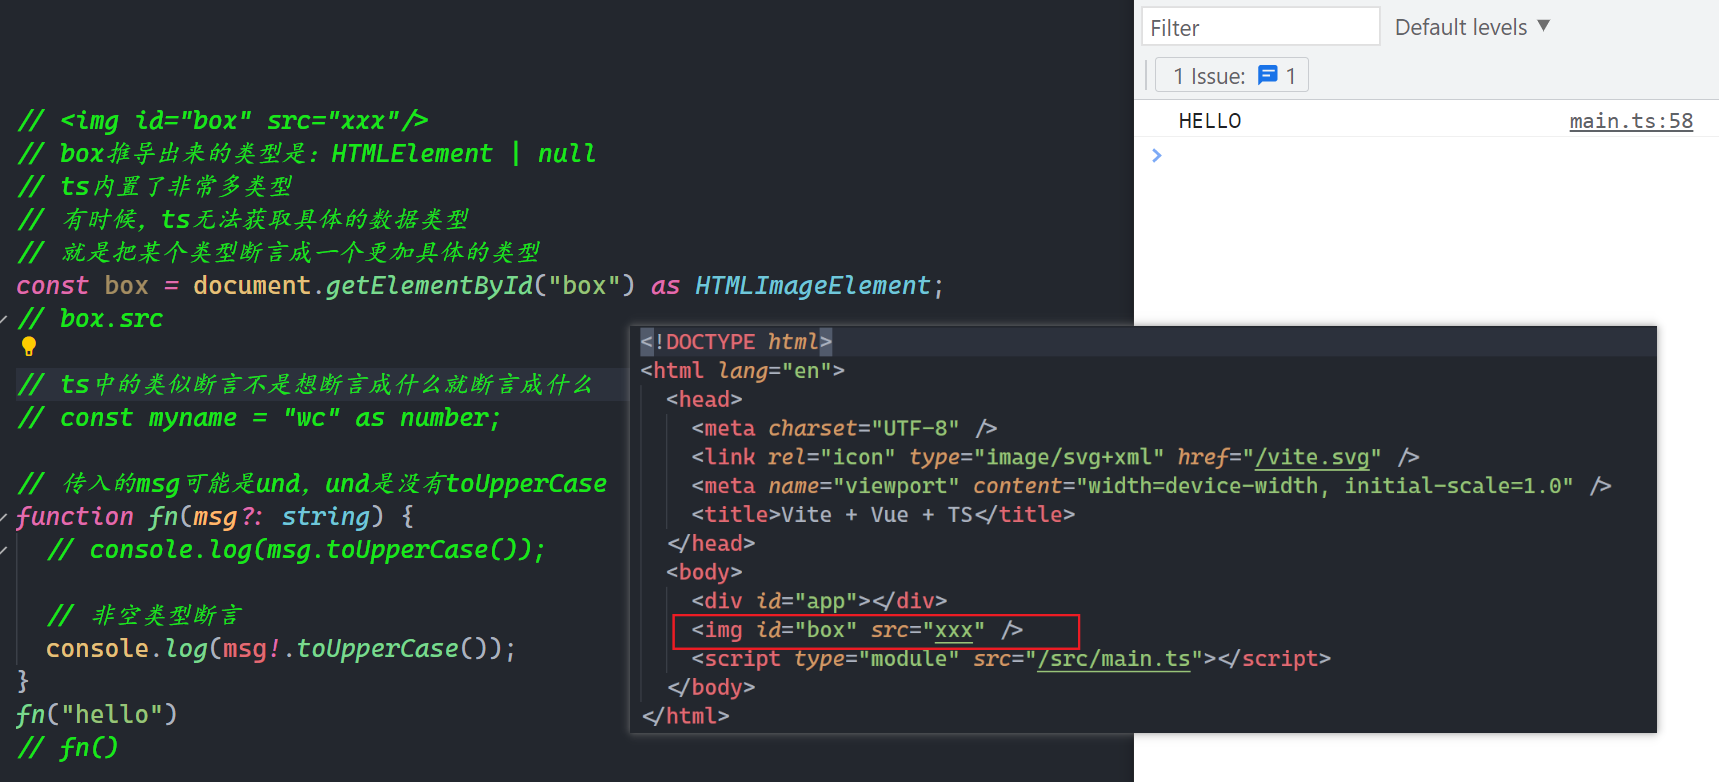
# 17)类型断言
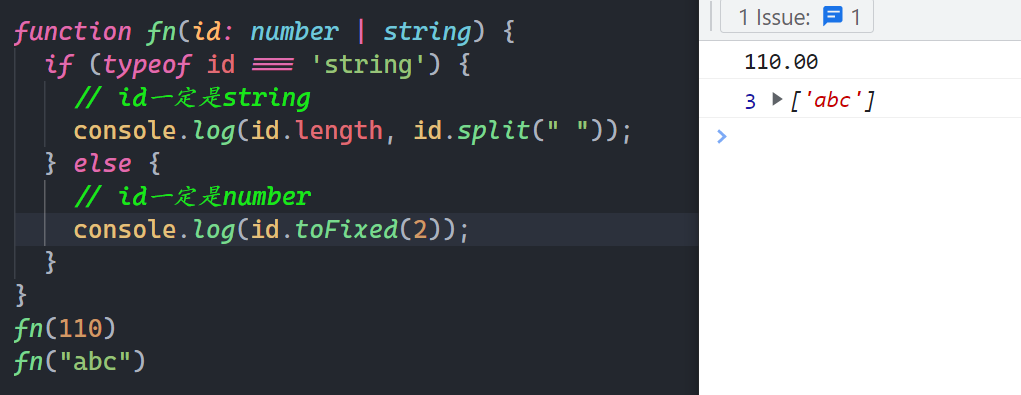
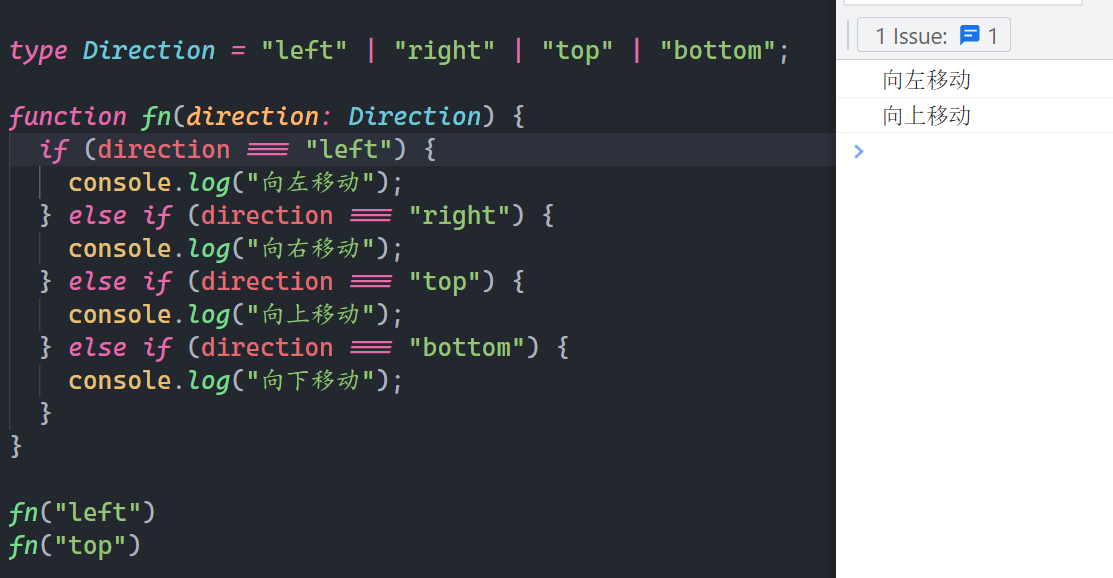
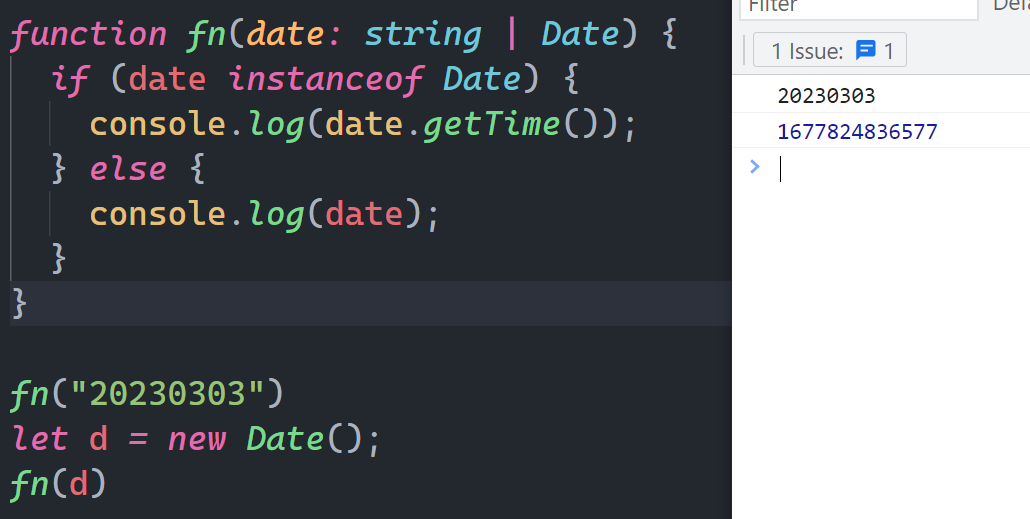
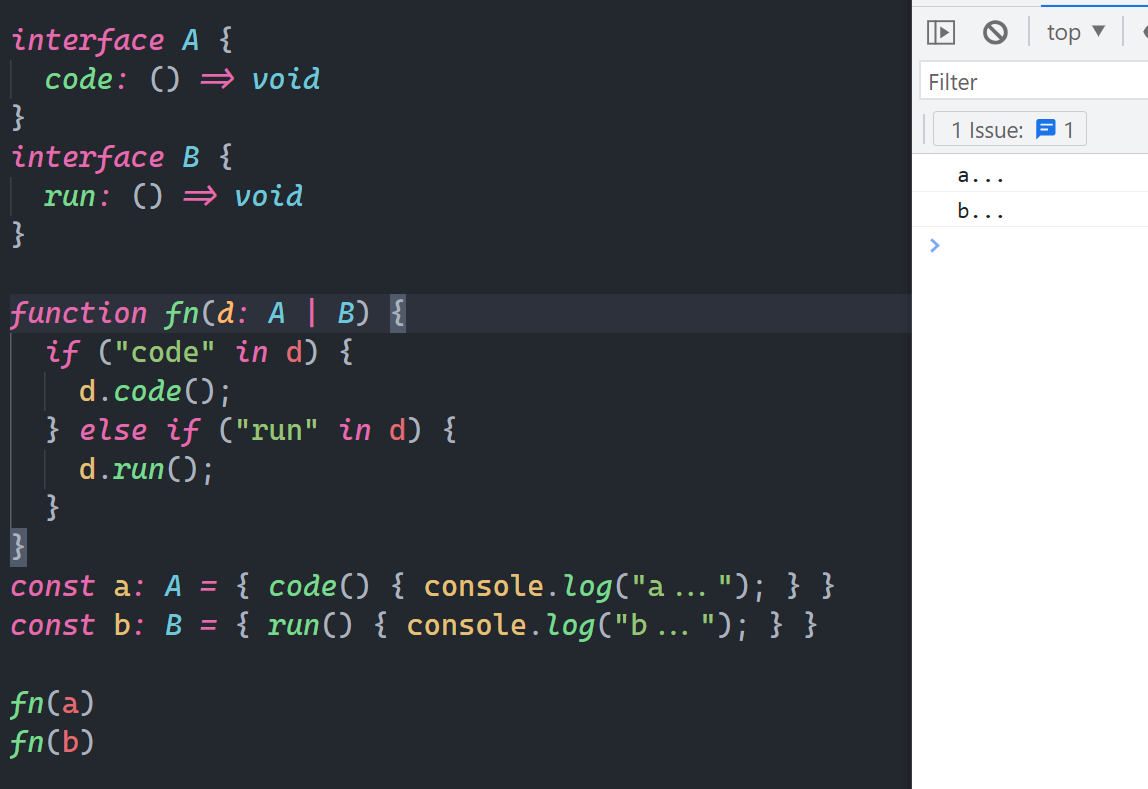
# 4,类型缩小
- typeof
- 平等缩小(比如===、!==)
- instanceof
- in
- ...
参考代码:
# 5,泛型(类型参数化)
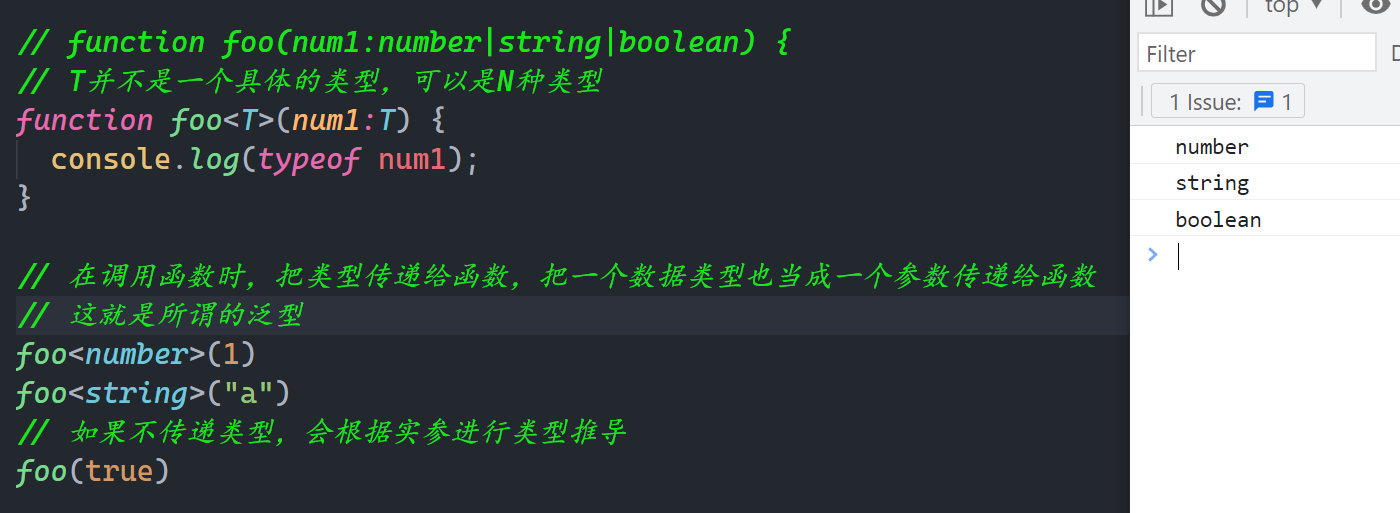
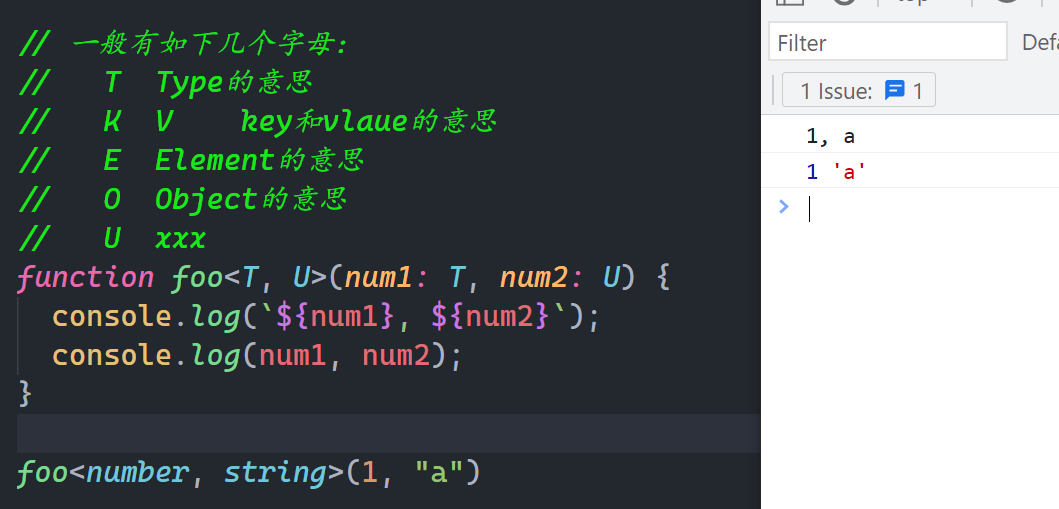
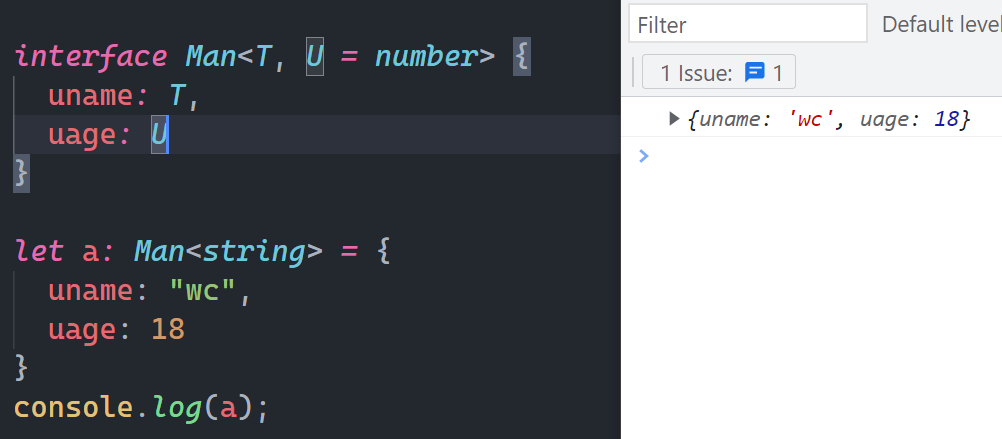
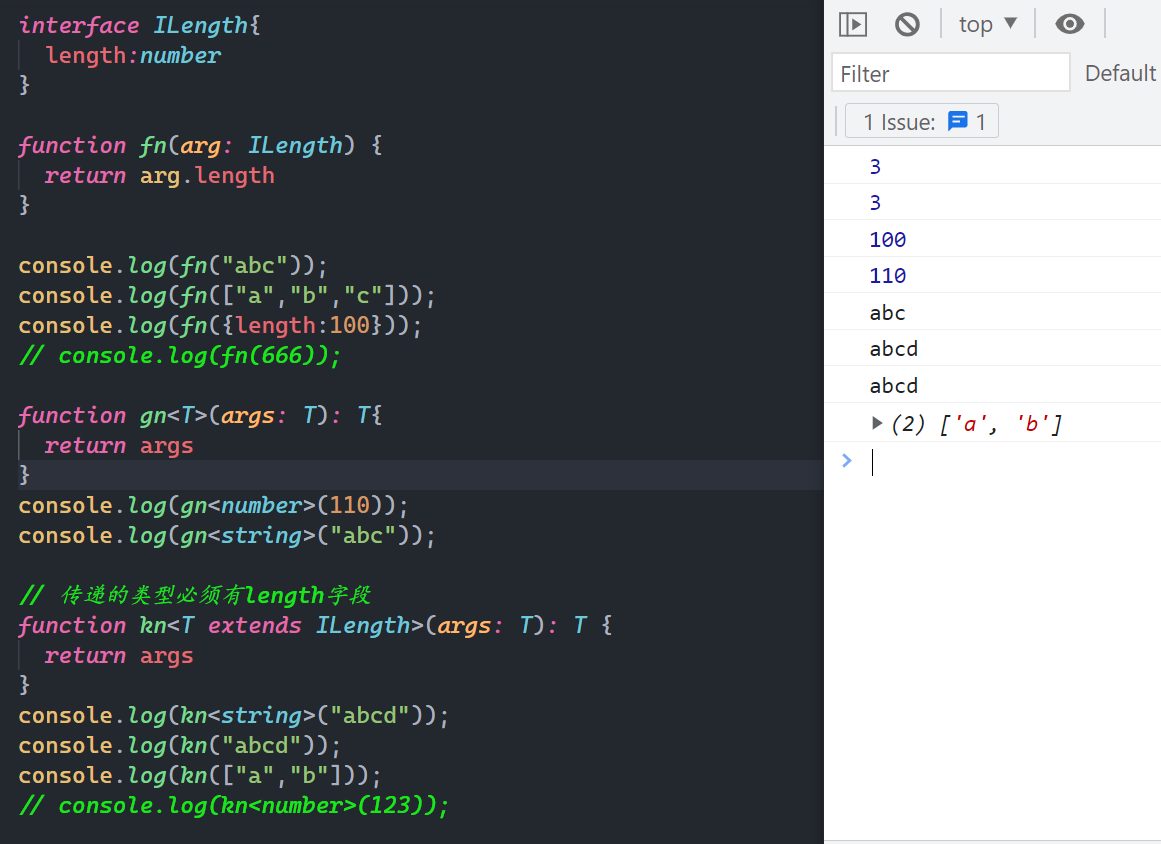
当我们定义函数或接口时不能指定确定的类型,当接口或函数使用时才能确定类型,此时我们必须使用泛型。
# 1)一个泛型
# 2)多个泛型
# 3)自定义类型支持泛型
# 6,类型声明
在一个ts项目中,类型声明通常有两类:
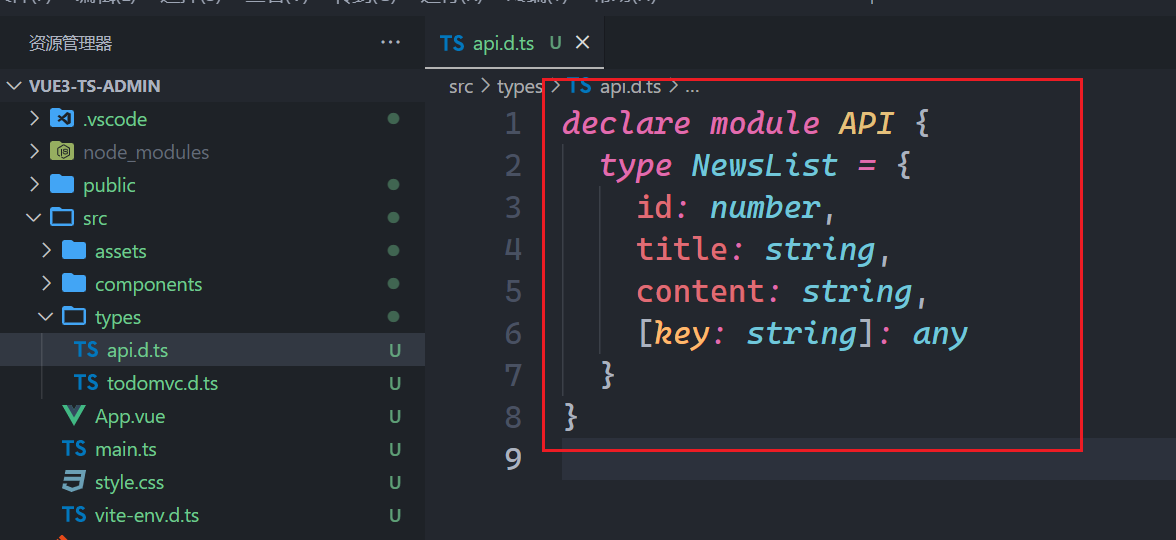
- 自定义类型声明文件 *.d.ts 后缀必须是.d.ts,必须的
- 第三方的类型声明文件 @types/*
对于第三方的类型声明文件文件,在安装第三方包时,有的是自动安装对应的类型声明文件,有的需要我们手动安装。
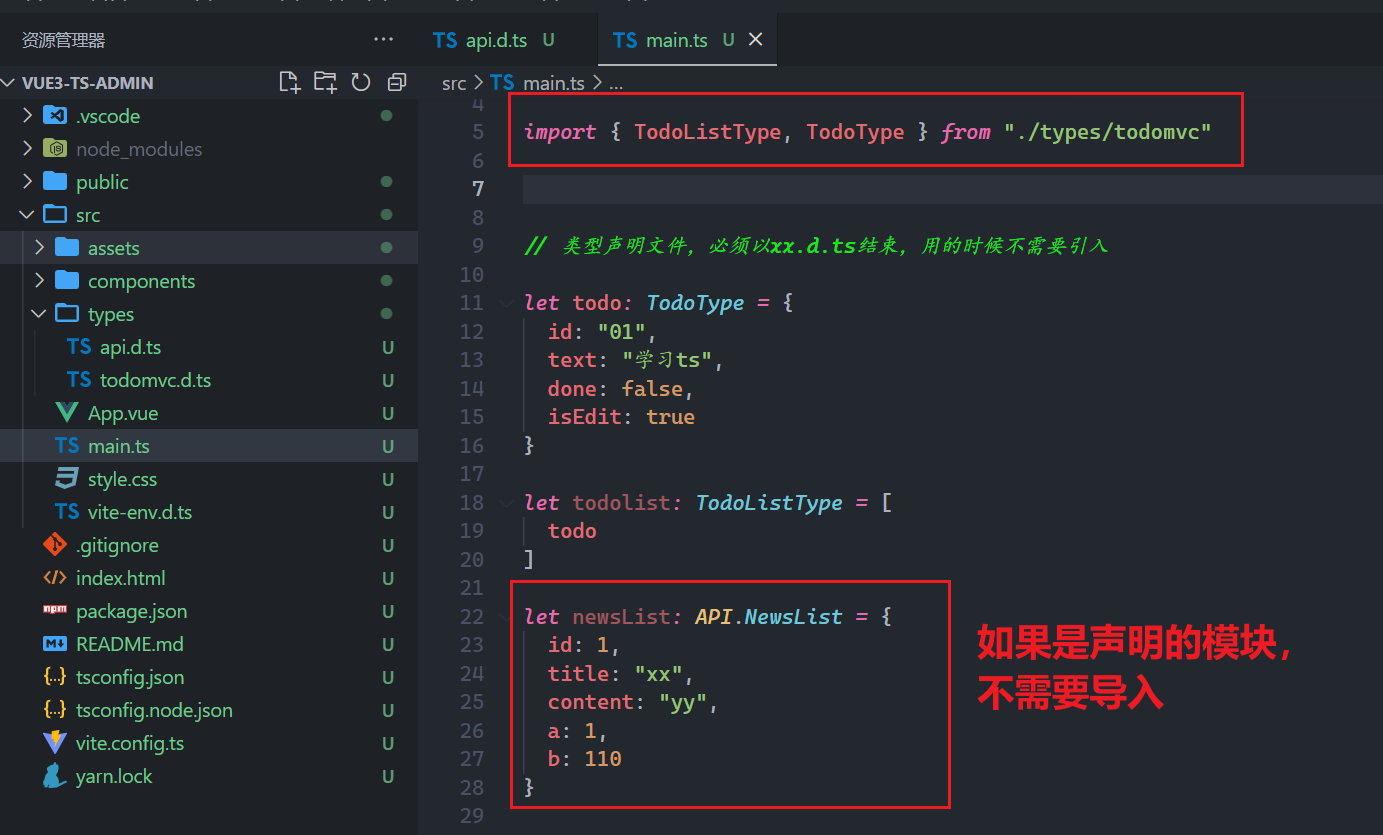
自定义类型声明文件,使用如下:
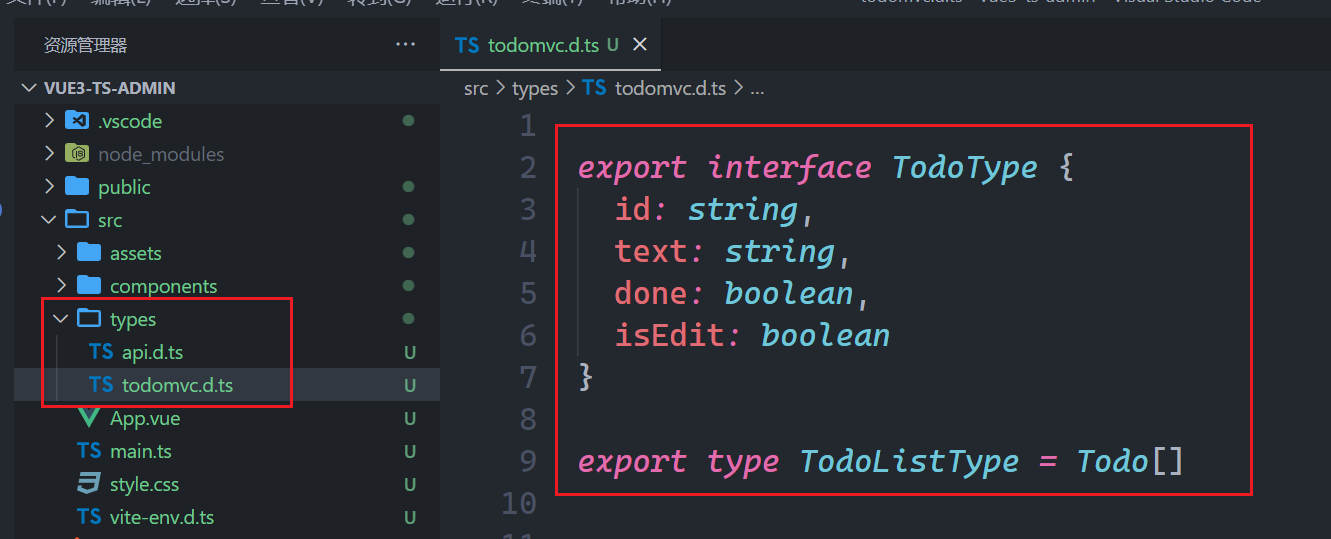
然后,就可以使用类型声明文件,如下:
第三方的类型声明文件:

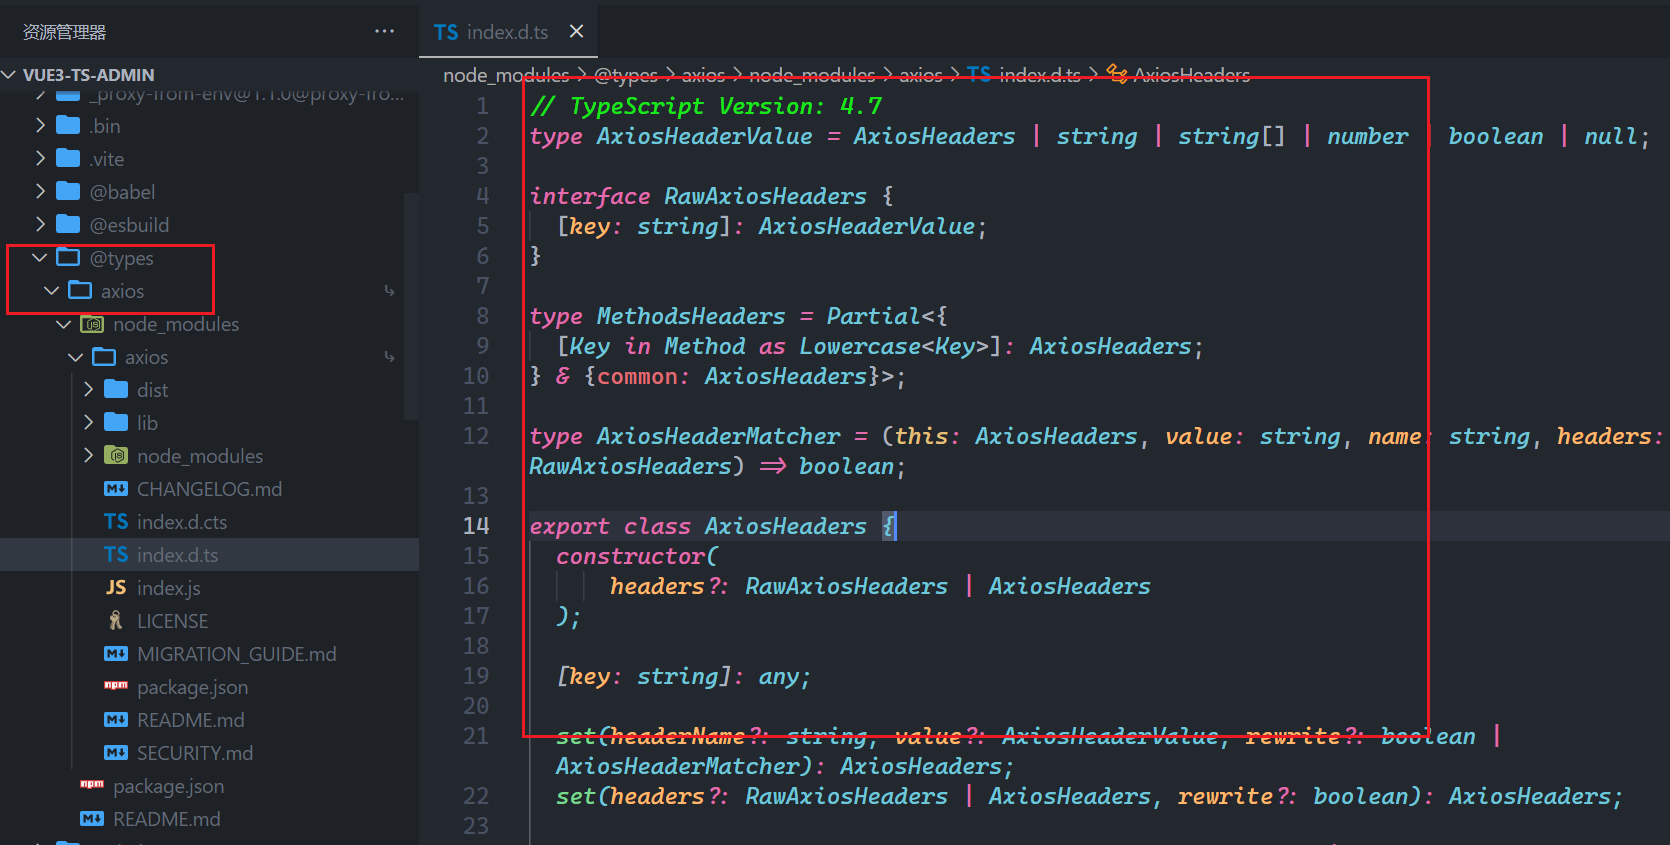
都是需要安装的,只不过,有的包安装时,会自动安装对应的类型声明文件,有的需要我们手动安装。第三方类型声明文件,用的时候,需要手动导入。
# 二,实现todomvc
# 1,准备工作
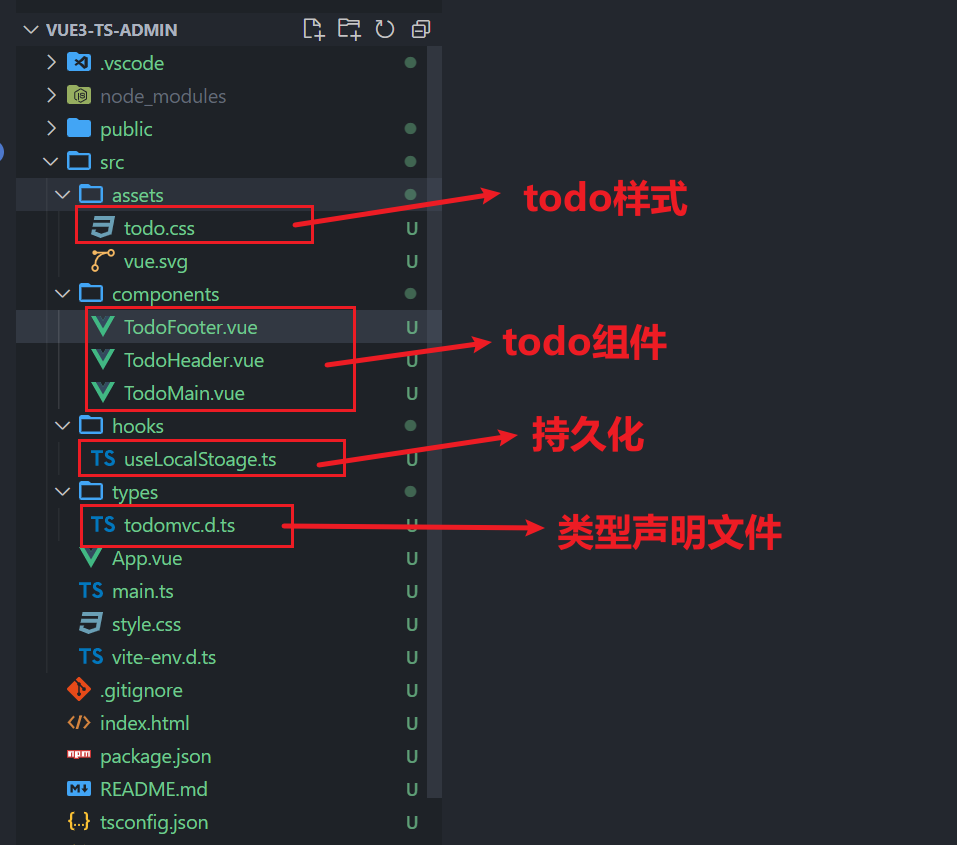
参考代码:
// TodoHeader.vue

<template>
    <header class="header">
        <h1>todos</h1>
        <input class="new-todo" autofocus autocomplete="off" placeholder="What needs to be done?" />
    </header>
</template>

<script setup lang="ts">
</script>
1
2
3
4
5
6
7
8
9
10
11
12
2
3
4
5
6
7
8
9
10
11
12
// TodoMain.vue

<template>
    <section class="main">
        <input id="toggle-all" class="toggle-all" type="checkbox" />
        <label for="toggle-all">Mark all as complete</label>
        <ul class="todo-list">
            <!-- :class="{ completed: item.done }" -->
            <li class="todo">
                <div>
                    <input class="toggle" type="checkbox" />
                    <label>学习vue</label>
                    <button class="destroy"></button>
                </div>
                <input class="edit" type="text" style="display: none;" />
            </li>
        </ul>
    </section>
</template>

<script setup lang="ts">
</script>
1
2
3
4
5
6
7
8
9
10
11
12
13
14
15
16
17
18
19
20
21
22
23
2
3
4
5
6
7
8
9
10
11
12
13
14
15
16
17
18
19
20
21
22
23
// TodoFooter.vue

<template>
  <footer class="footer">
    <span class="todo-count"> <strong></strong> 1 item left </span>
    <ul class="filters">
      <li><a href="">All</a></li>
      <li><a href="">Active</a></li>
      <li>
        <!-- :class="{ selected: visibility == 'Completed'} -->
        <a href="">Completed</a>
      </li>
    </ul>
    <button class="clear-completed">Clear completed</button>
  </footer>
</template>

<script setup lang="ts">
</script>
1
2
3
4
5
6
7
8
9
10
11
12
13
14
15
16
17
18
19
2
3
4
5
6
7
8
9
10
11
12
13
14
15
16
17
18
19
// App.vue

<template>
  <section class="todoapp">
    <TodoHeader></TodoHeader>
    <TodoMain></TodoMain>
    <TodoFooter></TodoFooter>
  </section>
</template>

<script setup lang="ts">
import TodoHeader from "./components/TodoHeader.vue";
import TodoMain from "./components/TodoMain.vue";
import TodoFooter from "./components/TodoFooter.vue";
</script>
1
2
3
4
5
6
7
8
9
10
11
12
13
14
15
2
3
4
5
6
7
8
9
10
11
12
13
14
15
// main.ts

import { createApp } from 'vue'
import App from './App.vue'
import "./assets/todo.css"


createApp(App).mount('#app')
1
2
3
4
5
6
7
8
2
3
4
5
6
7
8
效果如下:
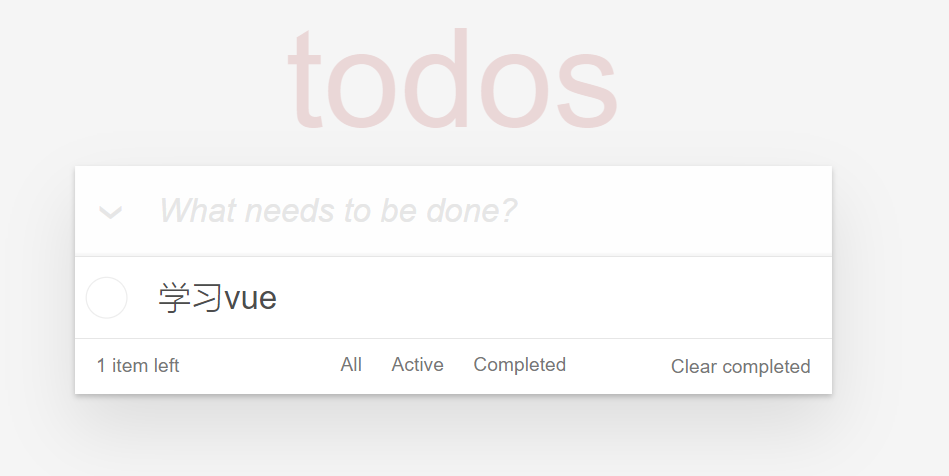
还需要安装pinia,如下:

# 2,显示todo
定义todo和todoList的类型,如下:
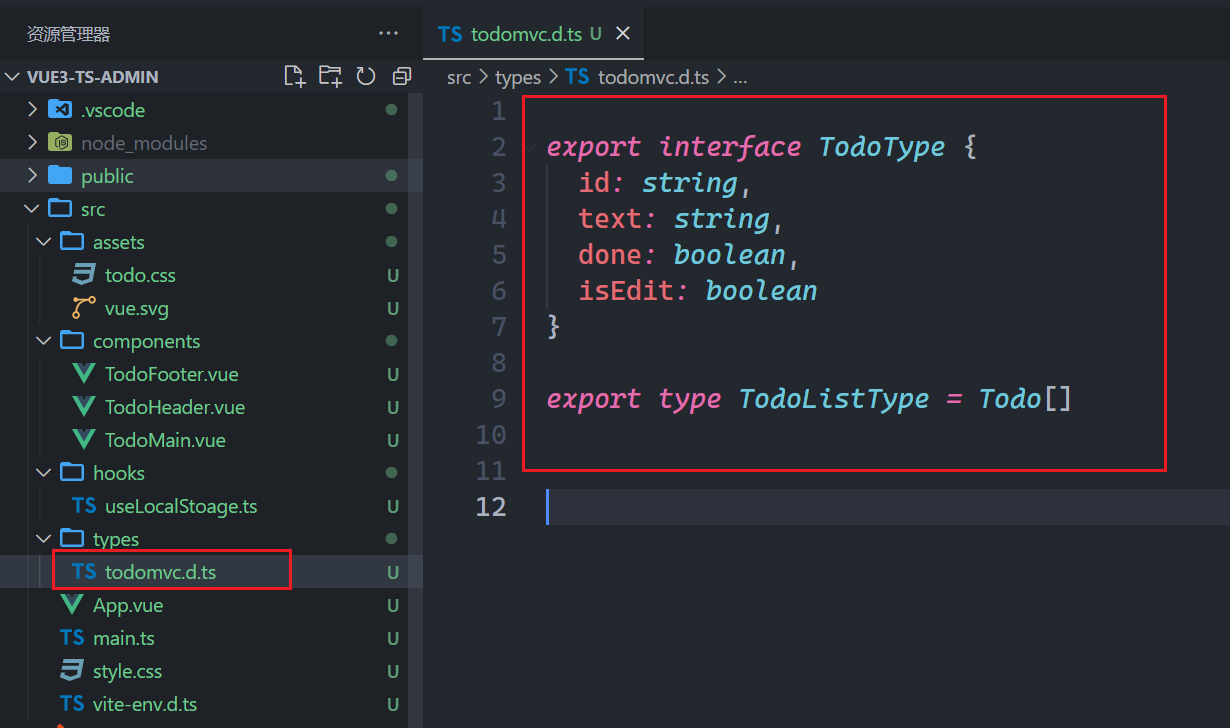
创建仓库,如下:
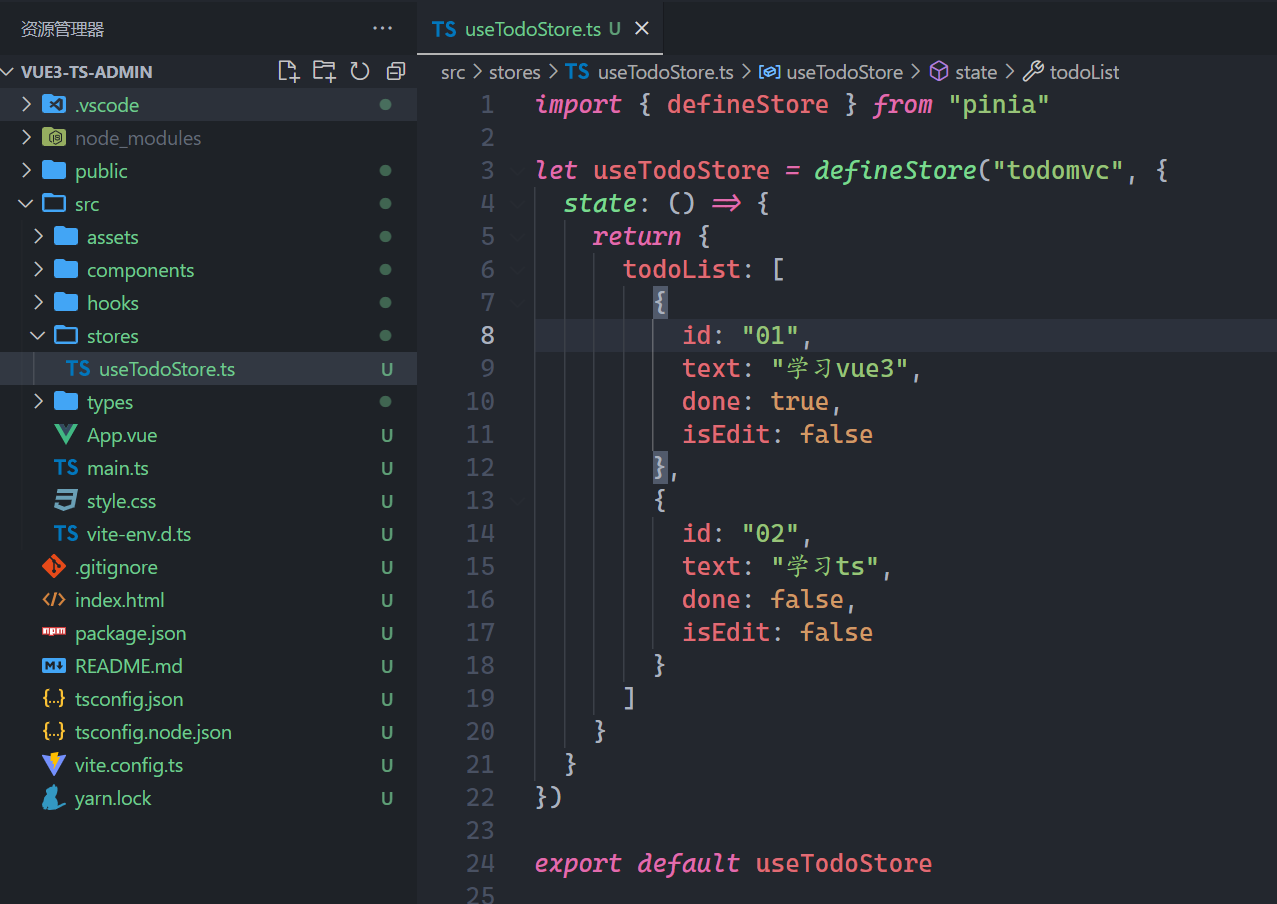
在main.ts中,使用仓库,如下:
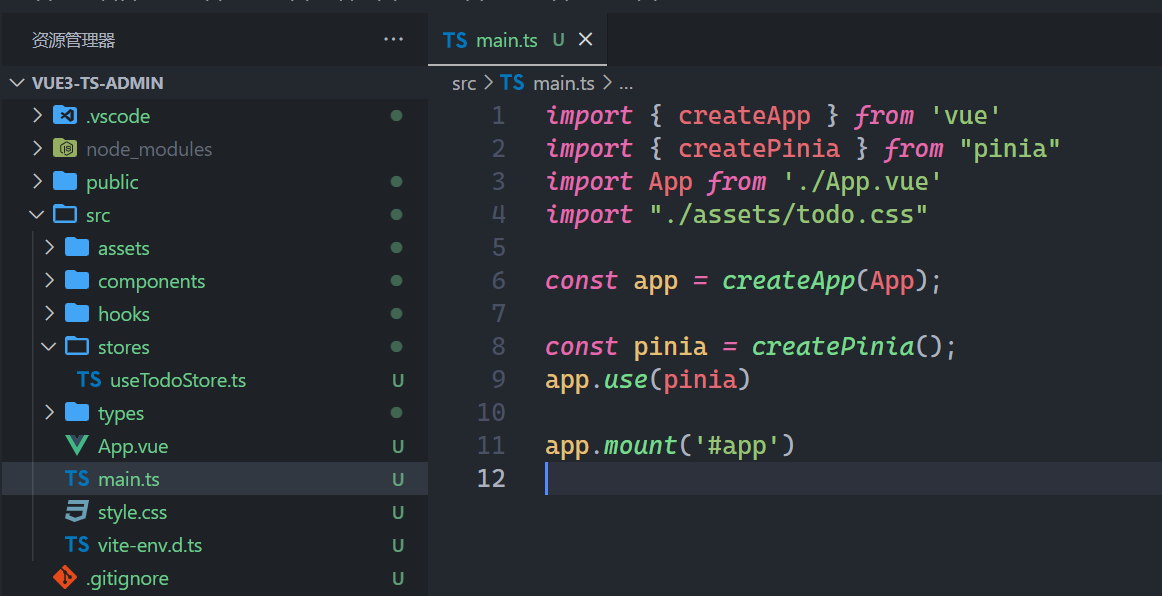
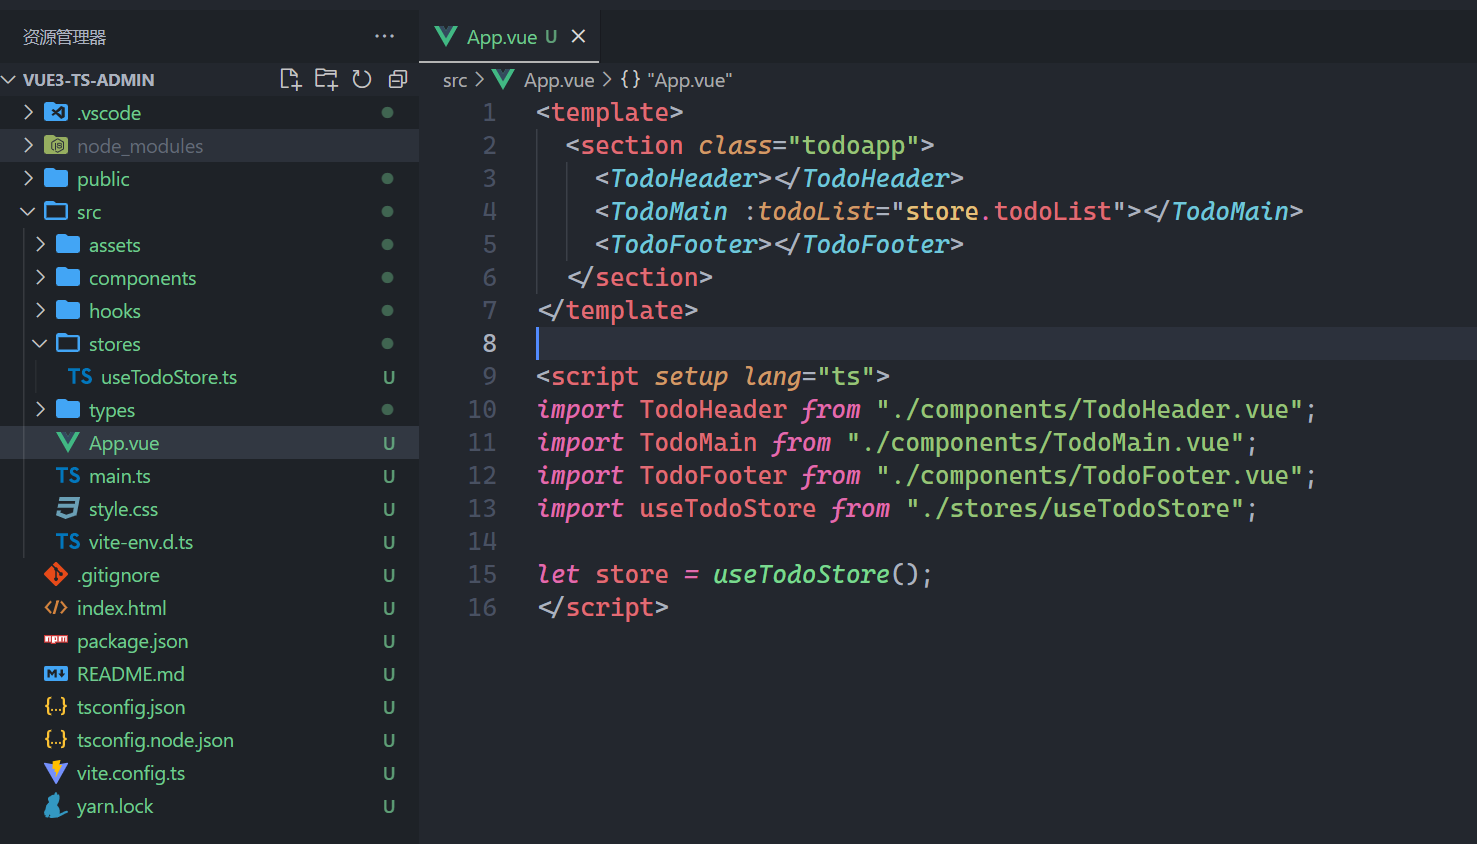
在App组件,获取仓库中的数据,如下:
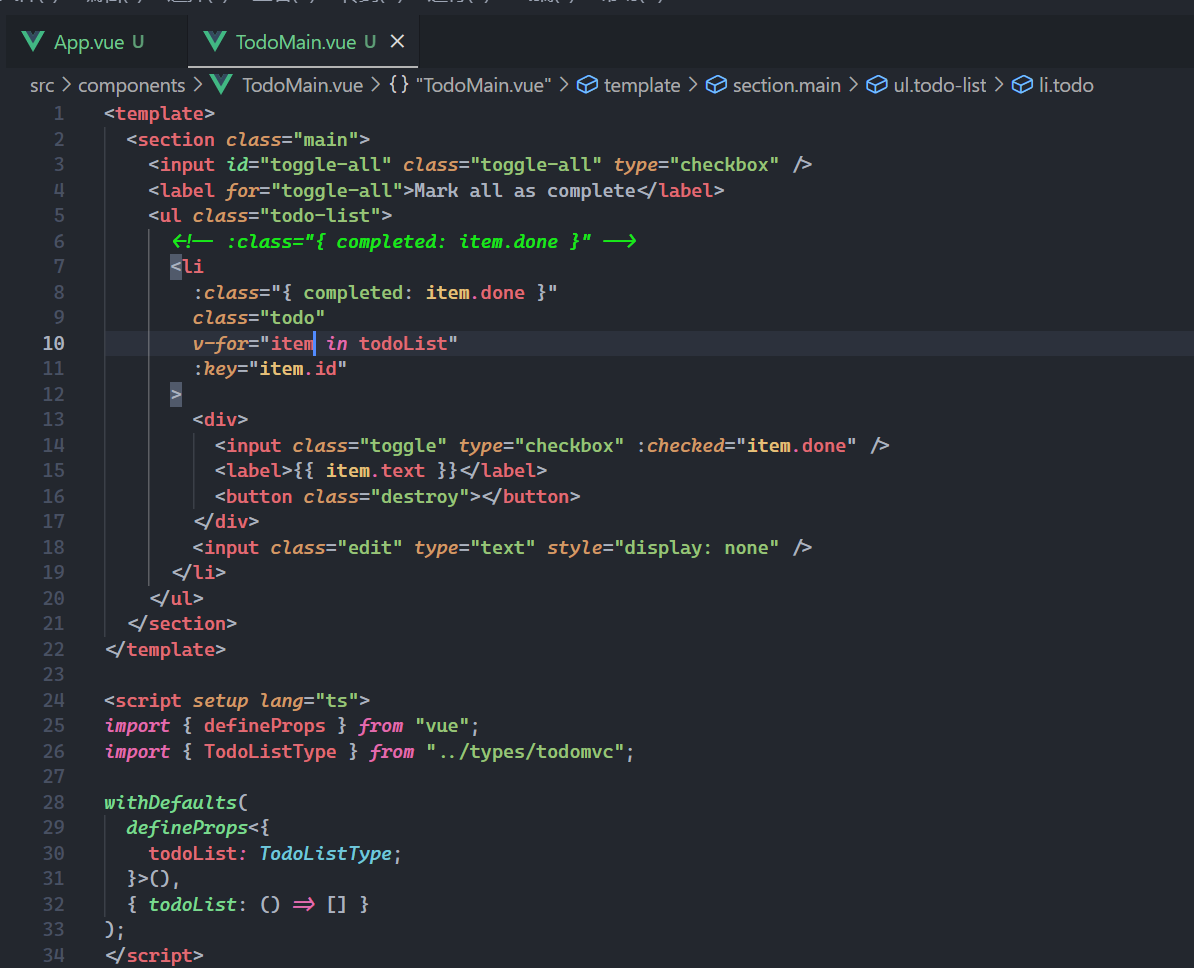
在TodoMain组件中接收数据,使用数据,如下:
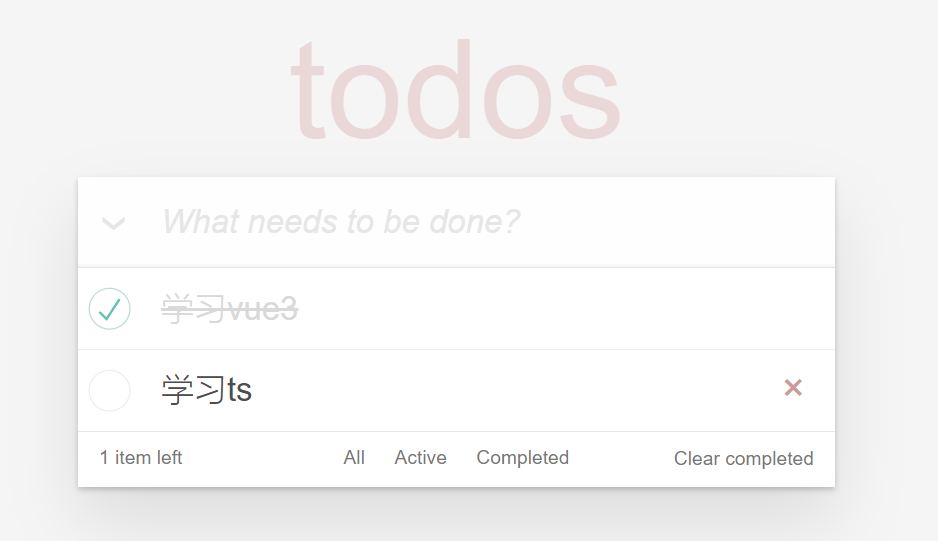
效果如下:
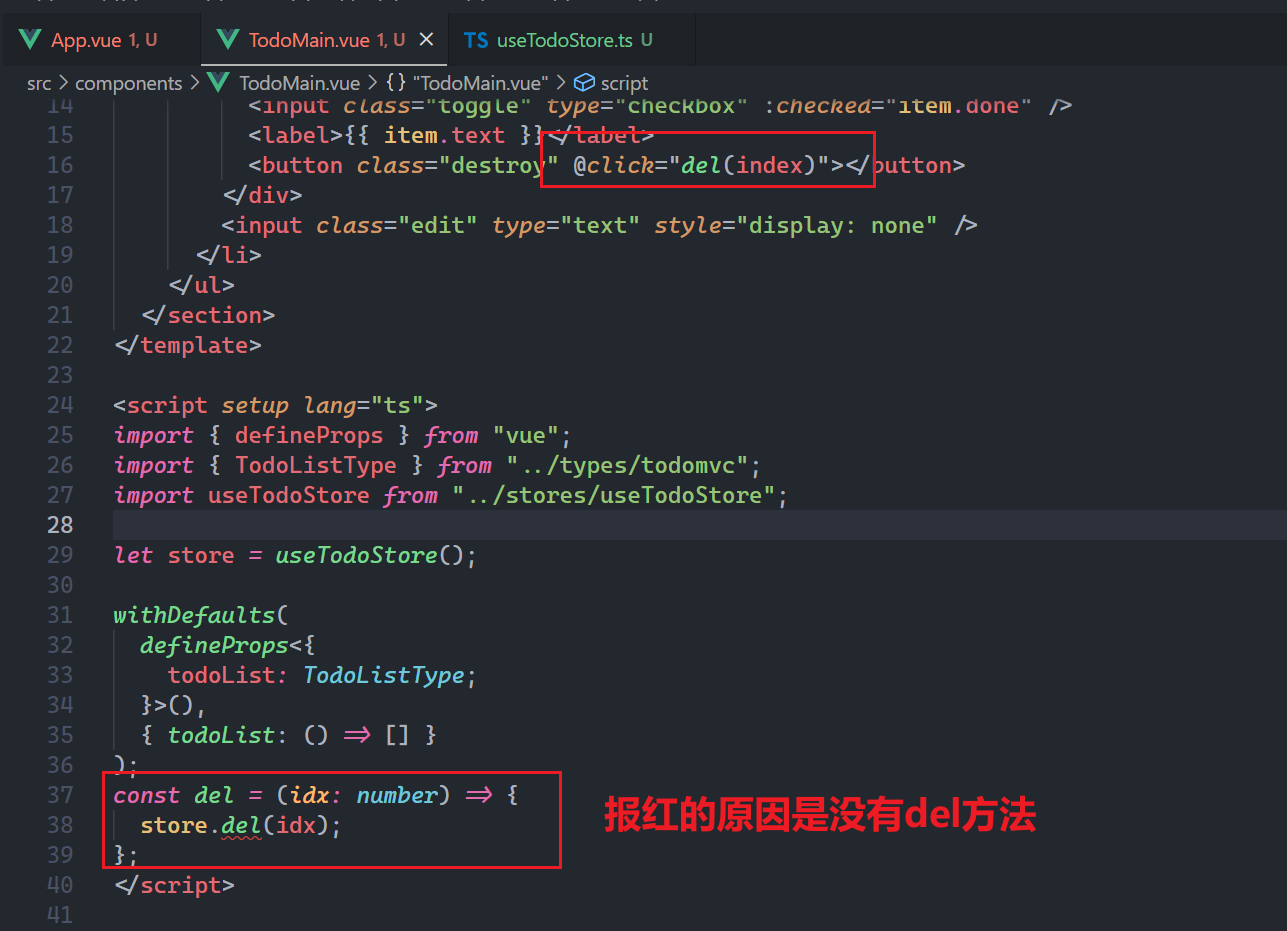
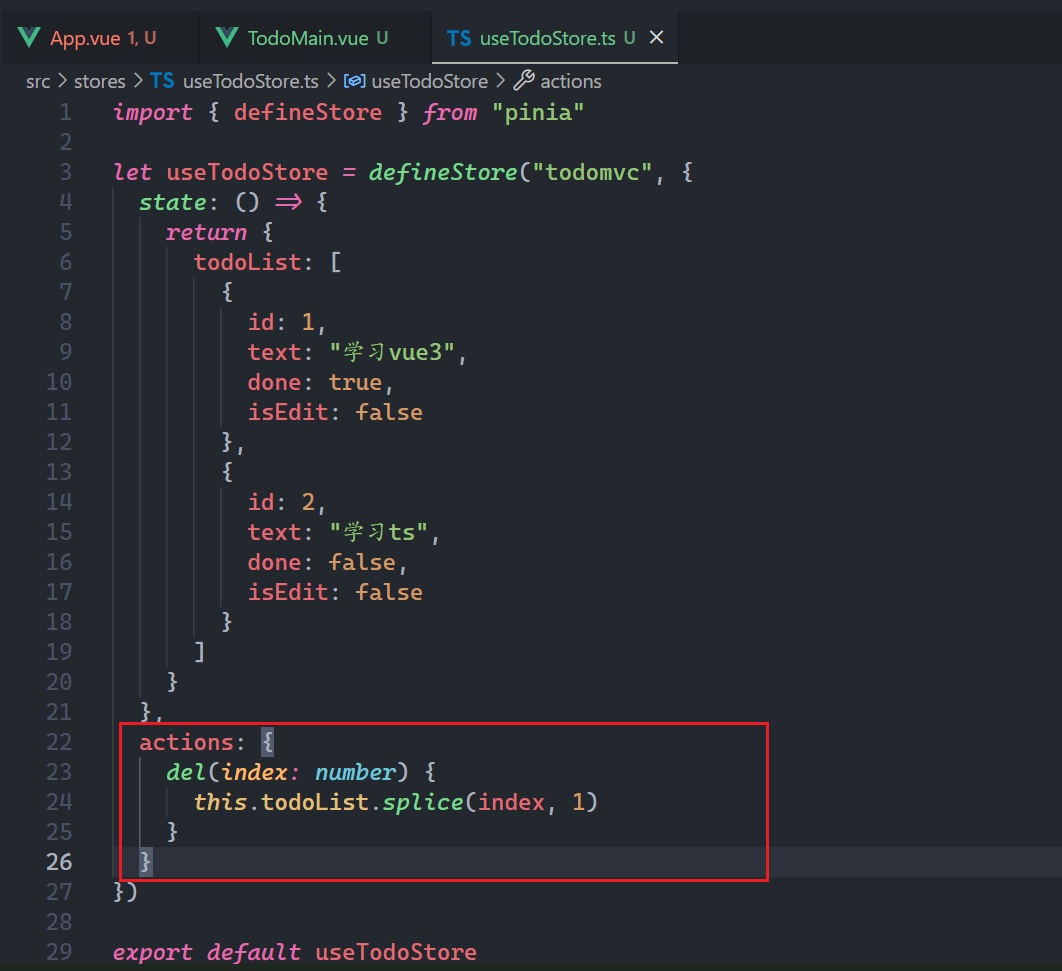
# 3,删除todo
# 4,其它功能
其它功能自行实现,参考地址:https://gitee.com/tubie/todomvc-vue3-ts.git
# 三,研究vben
# 1,运行项目
安装依赖,如下:

运行项目,如下:

效果如下:
