07-RestfulAPI和KOA其它内容
# 1. 设计Restful API
Representational State Transfer翻译过来是"表现层状态转化”, 它是一种互联网软件的架构原则。因为符合REST风格的Web API设计,就称它为Restful API,RESTful是目前最流行的API规范,适用于Web接口规范的设计。让接口易读,且含义清晰。本文将介绍如何设计易于理解和使用的API,并且借助Docker api的实践说明。
# 1.1 URL 设计
动词+宾语
它的核心思想就是客户端发出的数据操作指令都是「动词+宾语」的结构,比如GET /articles这个命令,GET是动词,/articles是宾语。
动词通常来说就是五种HTTP方法,对应我们业务接口的CRUD操作。而宾语就是我们要操作的资源,可以理解成面向资源设计。我们所关注的数据就是资源。
- GET: 读取资源
- POST: 新建资源
- PUT: 更新资源
- PATCH: 资源部分数据更新
- DELETE: 删除资源
正确的例子
- GET /zoos: 列出所有动物园
- POST /zoos: 新建一个动物园
- GET /zoos/id: 获取某个指定动物园的信息
- PUT /zoos/id: 更新某个指定动物园的信息(提供该动物园的全部信息)
- PATCH /zoos/id: 更新某个指定动物园的信息(提供该动物园的部分信息)
- DELETE/zoos/id: 删除某个动物园
- GET /zoos/id/animals: 列出某个指定动物园的所有动物
- DELETE/zoos/id/animals/id: 删除某个指定动物园的指定动物
# 1.2 动词的覆盖
有些客户端只能使用GET和POST这两种方法。服务器必须接受POST模拟其他三个方法(PUT、PATCH、DELETE)。这时,客户端发出的 HTTP请求,要加上X-HTTP-Method-Override属性,告诉服务器应该使用哪一个动词,覆盖POST 方法。
# 1.3 宾语必须是名词
就是API的url,是HTTP动词作用的对象,所以应该是名词。例如/books这个URL就是正确的,而下面的URL不是名词,都是错误的写法。如下:
GET / getAllUsers ? name = wc
POST / createUser
POST / deleteUSer
2
3
# 1.4 复数名词
URL是名词,那么是使用复数还是单数? 没有统一的规定,但是我们通常操作的数据多数是一个集合,比如GET/books , 所以我们就使用复数。统一规范,建议都使用复数URL,比如获取id =2的书GET /books/2要好于GET/book/2 。
# 1.5 避免出现多级URL
有时候我们要操作的资源可能是有多个层级,因此很容易写多级URL,比如获取某个作者某种分类的文章。
GET / authors / 2 / categories / 2 // 获取作者ID=2获取分类=2的文章
这种URL不利于拓展,语义也不清晰更好的方式就是除了第一级,其他级别都是通过查询字符串表达。正确方式:
GET / authors / 2 ? categories = 2
查询已发布的文章
错误写法: GET / artichels / published
正确写法: GET / artichels ? published = true
2
# 1.6 过滤信息
状态码如果记录数量很多,服务器不可能都将它们返回给用户。API应该提供参数, 过滤返回结果。
下面是一些常见的参数。
- ?limit=10: 指定返回记录的数量
- ?offset=10: 指定返回记录的开始位置。
- ?page=2&per_page=100: 指定第几页,以及每页的记录数。
- ?sortby=name&order=asc: 指定返回结果按照哪个属性排序,以及排序顺序。
- ?animal_type_id=1: 指定筛选条件
参数的设计允许存在冗余,即允许API路径和URL参数偶尔有重复。比如,GET /zoo/ID/animals 与GET /animals?zoo-id=ID的含义是相同的。推荐后者,避免出现多级URL。
# 1.7 状态码必须精确
客户端的请求,服务求都必须响应,包含HTTP状态码和数据。
HTTP状态码就是一个三位数,分成五个类别。
1xx︰相关信息
2xx: 操作成功,200状态码表示操作成功,但是不同的方法可以返回更精确的状态码。
- GET: 200 OK
- POST: 201 Created
- PUT: 200 OK
- PATCH: 200 OK
- DELETE: 204 No Content
3xx: 重定向
4xx︰客户端错误,4xx状态码表示客户端错误,主要有下面几种。
- 400 Bad Request:服务器不理解客户端的请求,未做任何处理。
- 401 Unauthorized:用户未提供身份验证凭据,或者没有通过身份验证。
- 403 Forbidden:用户通过了身份验证,但是不具有访问资源所需的权限。
- 404 Not Found:所请求的资源不存在,或不可用。
- 405 Method Not Allowed:用户已经通过身份验证,但是所用的HTTP方法不在他的权限之内。
- 410 Gone:所请求的资源已从这个地址转移,不再可用。
- 415 Unsupported Media Type:客户端要求的返回格式不支持。比如,API只能返回JSON格式,但是客户端要求返回XMIL格式。
- 422 Unprocessable Entity :客户端上传的附件无法处理,导致请求失败。
- 429 Too Many Requests:客户端的请求次数超过限额。
5xx: 服务器错误,5xx状态码表示服务端错误。一般来说,API不会向用户透露服务器的详细信息,所以只要两个状态码就够了。
- 500 lnternal Server Error:客户端请求有效,服务器处理时发生了意外。
- 503 Service Unavailable:服务器无法处理请求,一般用于网站维护状态。
# 1.8 服务器响应
不要返回纯文本 API返回的数据格式,不应该是纯文本,而应该是一个JSON对象,因为这样才能返回标准的结构化数据。所以,服务器回应的HTTP头的Content-Type属性要设为application/json 。客户端请求时,也要明确告诉服务器,可以接受JSON格式,即请求的HTTP头的ACCEPT属性也要设成 application/json。下面是一个例子。
发生错误的时候,不要返回200状态码 有一种不恰当的做法是,即使发生错误,也返回200状态码,把错误信息放在数据体里面,就像下面这样。
HTTP / 1.1200 OK
Content - Type: application / json

{
    "status": "fail",
    "msg": "错误"
}
2
3
4
5
6
7
上面代码中,解析数据体以后,才能得知操作失败。这种做法实际上取消了状态码,这是完全不可取的。正确的做法是,状态码反映发生的错误,具体的错误信息放在数据体里面返回。下面是正确方式:
HTTP / 1.1 400 Bad Request
Content - Type: application / json

{
    "status": "fail",
    "msg": "错误"
}
2
3
4
5
6
7
# 2. Restful API案例
// router/user.js

const Router = require('@koa/router');
const router = new Router();
router.prefix('/user')

const users = [{
    id: 1,
    name: "wc"
}, {
    id: 2,
    name: "xq"
}];

router.get("/", ctx => {
    console.log("GET /users");
    const {
        name
    } = ctx.query; // ?name=xx
    let data = users;
    if (name) {
        data = users.filter(u => u.name === name);
    }
    ctx.body = {
        ok: 1,
        data
    };
});
router.get("/:id", ctx => {
    console.log("GET /users/:id");
    const {
        id
    } = ctx.params; // /users/1
    const data = users.find(u => u.id == id);
    ctx.body = {
        ok: 1,
        data
    };
});
router.post("/", ctx => {
    console.log("POST /users");
    const {
        body: user
    } = ctx.request; // 请求body

    user.id = users.length + 1;
    users.push(user);
    ctx.body = {
        ok: 1
    };
});
router.put("/", ctx => {
    console.log("PUT /users");
    const {
        body: user
    } = ctx.request; // 请求body
    const idx = users.findIndex(u => u.id == user.id);
    if (idx > -1) {
        users[idx] = user;
    }
    ctx.body = {
        ok: 1
    };
});
router.delete("/:id", ctx => {
    console.log("DELETE /users/:id");
    const {
        id
    } = ctx.params; // /users/1
    const idx = users.findIndex(u => u.id == id);
    if (idx > -1) {
        users.splice(idx, 1);
    }
    ctx.body = {
        ok: 1
    };
});

module.exports = router;
2
3
4
5
6
7
8
9
10
11
12
13
14
15
16
17
18
19
20
21
22
23
24
25
26
27
28
29
30
31
32
33
34
35
36
37
38
39
40
41
42
43
44
45
46
47
48
49
50
51
52
53
54
55
56
57
58
59
60
61
62
63
64
65
66
67
68
69
70
71
72
73
74
75
76
77
78
79
入口JS如下:
const Koa = require('koa')
const index = require('./router/index')
const users = require('./router/user')
const bodyParser = require('koa-bodyparser')
const app = new Koa()

app.use(bodyParser());

// 注册路由
app.use(index.routes())
index.allowedMethods()
app.use(users.routes())
users.allowedMethods()

app.listen(3000, () => {
    console.log('3000端口被监听了~~')
})
2
3
4
5
6
7
8
9
10
11
12
13
14
15
16
17
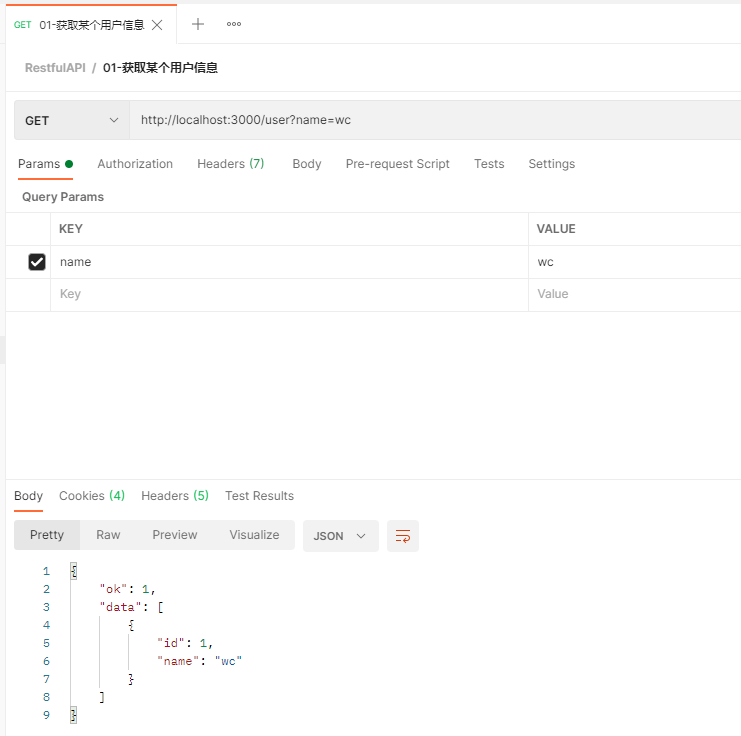
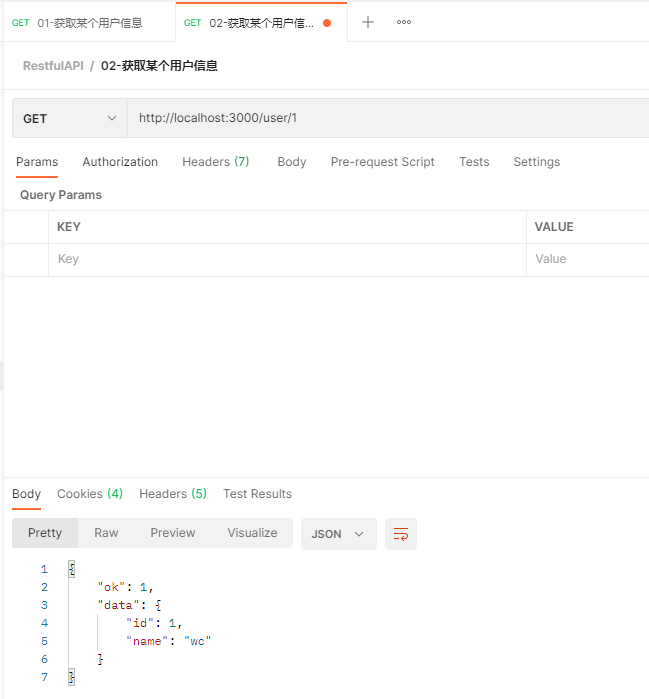
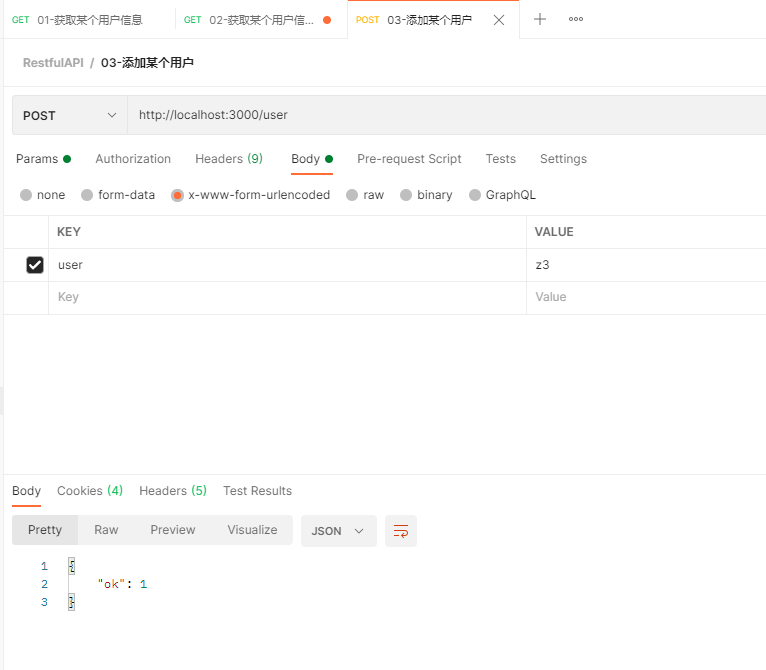
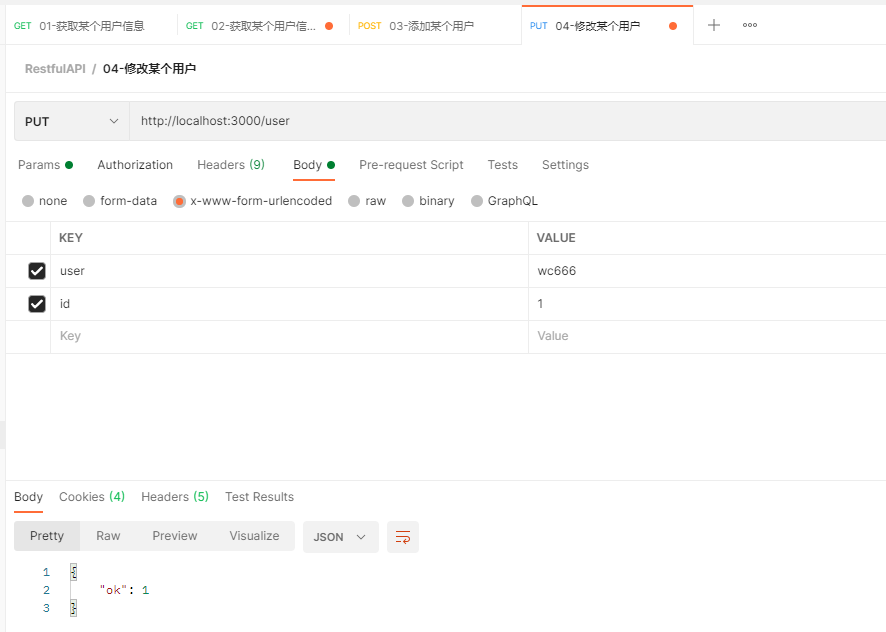
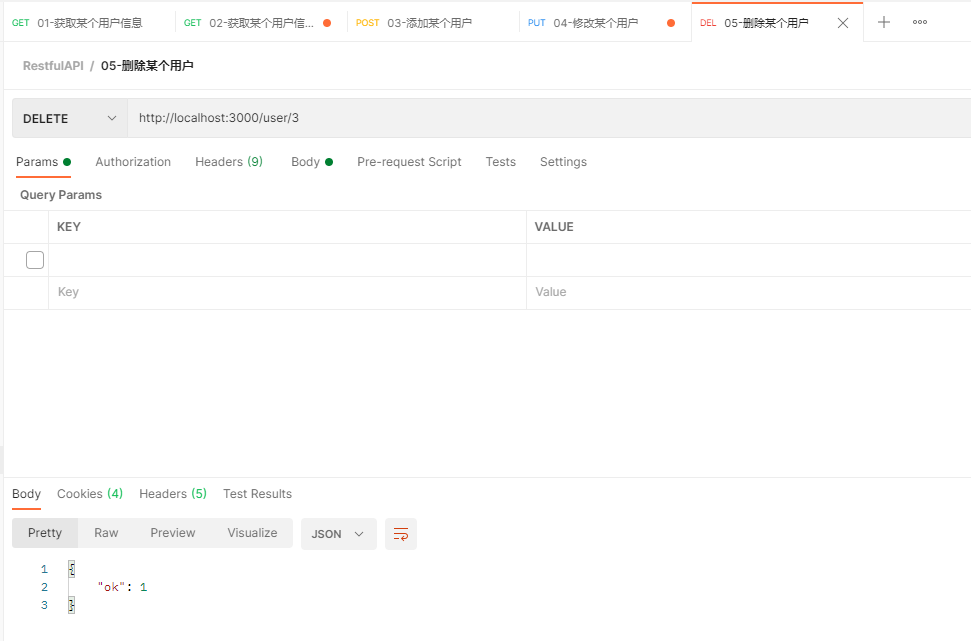
postman效果如下:
# 3. KOA其它知识
# 3.1 解决跨域
安装: npm i koa2-cors
- 后面讲完ajax后,会详细讲跨域
使用:
const koa = require('koa');
const cors = require('koa2-cors');
const app = new koa();
app.use(cors());
2
3
4
# 3.2 文件上传
安装: npm i koa-multer@1.0.2
配置代码如下:
// router/index.js

const Router = require('@koa/router');
const multer = require('koa-multer')
// 配置 磁盘存储
const storage = multer.diskStorage({
    // 文件保存路径
    destination: function(req, file, cb) {
        cb(null, 'public/images')
    },
    // 修改文件名称
    filename: function(req, file, cb) {
        // 1.png
        const filterFormat = file.originalname.split('.')
        cb(null, Date.now() + '.' + filterFormat[filterFormat.length - 1])
    },
})
const upload = multer({
    storage
})

const router = new Router();

router.prefix('/user')

router.post('/upload', upload.single('avatar'), (ctx, next) => {
    // file 是avatar文件的信息
    // ctx.req.body 文本域的数据 如果存在
    console.log(ctx.req.file.filename)
    ctx.body = {
        ok: 1,
    }
})

module.exports = router;
2
3
4
5
6
7
8
9
10
11
12
13
14
15
16
17
18
19
20
21
22
23
24
25
26
27
28
29
30
31
32
33
34
35
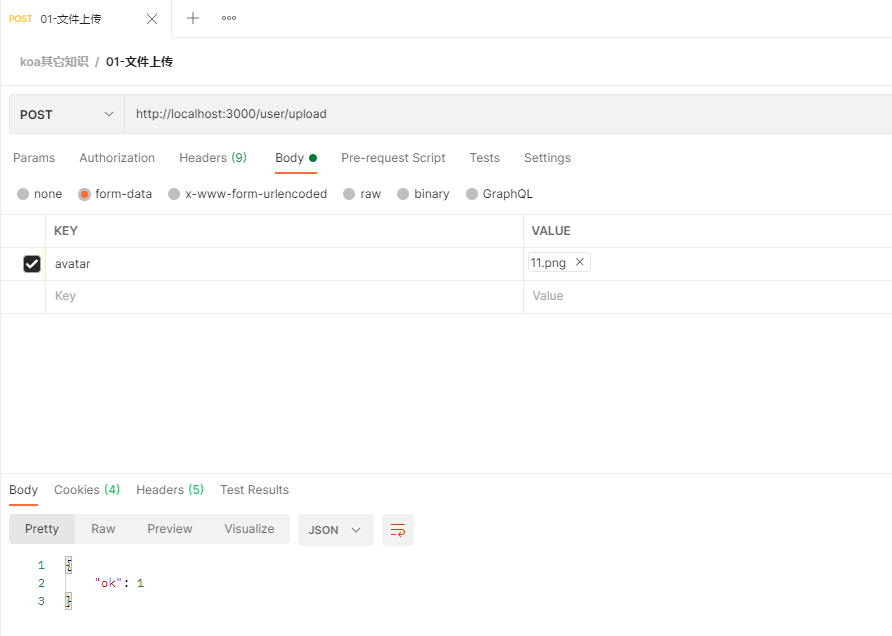
postman中测试如下:
# 3.3 表单验证
安装: npm i koa-bouncer@6.0.0
// router/index.js

const Router = require('@koa/router');
const bouncer = require('koa-bouncer')
const router = new Router();

router.prefix('/user')

// 表单验证
router.post('/', async (ctx, next) => {
    console.log(ctx.request.body)
    // ctx.request.body  {uname,pwd1,pwd2}
    try {
        /*
        ctx.validateBody('username')
        .required('Username is required')
        .isString()
        .trim()
        .isLength(3, 15, 'Username must be 3-15 chars');

        */
        ctx
            .validateBody('uname')
            .required('用户名是必须的')
            .isString()
            .trim()
            .isLength(4, 8, '用户名必须是4~8位')
        ctx
            .validateBody('email')
            .optional()
            .isString()
            .trim()
            .isEmail('非法的邮箱格式')
        ctx
            .validateBody('pwd1')
            .required('密码是必填项')
            .isString()
            .trim()
            .isLength(6, 16, '密码必须是6~16位')
        ctx
            .validateBody('pwd2')
            .required('密码是必填项')
            .isString()
            .trim()
            .eq(ctx.vals.pwd1, '两次密码不一致')

        console.log(ctx.vals)
        ctx.body = {
            code: 1,
        }
    } catch (error) {
        // 校验异常
        if (error instanceof bouncer.ValidationError) {
            console.log(error)
            ctx.status = 400
            ctx.body = {
                code: 400,
                message: '校验失败:' + error.message,
            }
            return
        }
        throw error
    }
})

module.exports = router;
2
3
4
5
6
7
8
9
10
11
12
13
14
15
16
17
18
19
20
21
22
23
24
25
26
27
28
29
30
31
32
33
34
35
36
37
38
39
40
41
42
43
44
45
46
47
48
49
50
51
52
53
54
55
56
57
58
59
60
61
62
63
64
65
66
入口JS如下:
const Koa = require('koa')
const index = require('./router/index')
const users = require('./router/user')
const bodyParser = require('koa-bodyparser')
const static = require('koa-static');
const bouncer = require('koa-bouncer');
const app = new Koa()

app.use(bouncer.middleware());

app.use(bodyParser());

app.use(static(__dirname + '/public'))

// 注册路由
app.use(index.routes())
index.allowedMethods()
app.use(users.routes())
users.allowedMethods()

app.listen(3000, () => {
    console.log('3000端口被监听了~~')
})
2
3
4
5
6
7
8
9
10
11
12
13
14
15
16
17
18
19
20
21
22
23
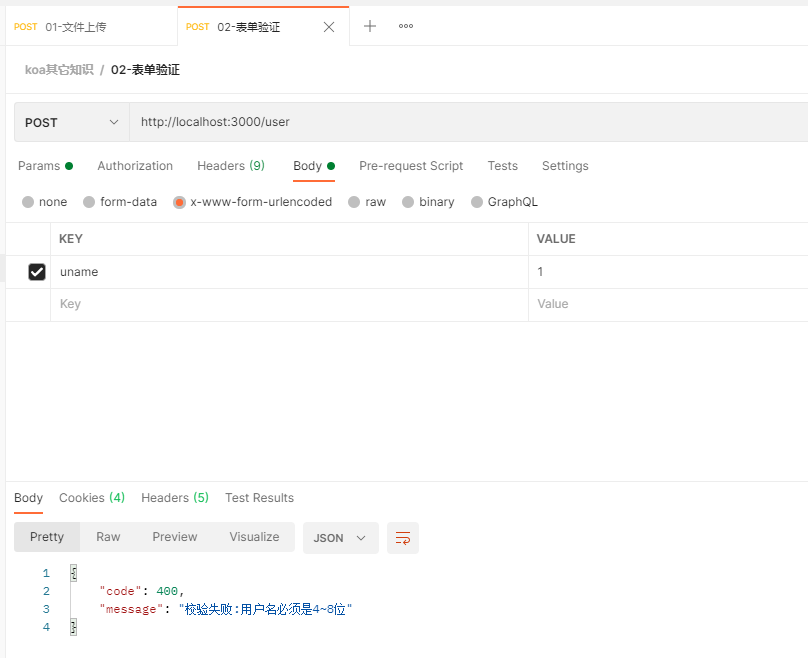
postman中测试如下:
# 3.4 图形验证码
安装: npm i trek-captcha@0.4.0
// router/index.js

const Router = require('@koa/router');
const bouncer = require('koa-bouncer')
const catpcha = require('trek-captcha')
const router = new Router();

router.prefix('/user')

// 图形验证码
router.get('/captcha', async (ctx, next) => {
    const {
        token,
        buffer
    } = await catpcha({
        size: 4
    });
    // ctx.state.bufferToken = token
    //token的作用 前端输入完验证码与此时的token做对比
    ctx.body = buffer;
})

module.exports = router;
2
3
4
5
6
7
8
9
10
11
12
13
14
15
16
17
18
19
20
21
22
23
入口JS:
const Koa = require('koa')
const index = require('./router/index')
const users = require('./router/user')
const bodyParser = require('koa-bodyparser')
const static = require('koa-static');
const bouncer = require('koa-bouncer');
const app = new Koa()

app.use(bouncer.middleware());

app.use(bodyParser());

app.use(static(__dirname + '/public'))

// 注册路由
app.use(index.routes())
index.allowedMethods()
app.use(users.routes())
users.allowedMethods()

app.listen(3000, () => {
    console.log('3000端口被监听了~~')
})
2
3
4
5
6
7
8
9
10
11
12
13
14
15
16
17
18
19
20
21
22
23
在postman中测试如下:
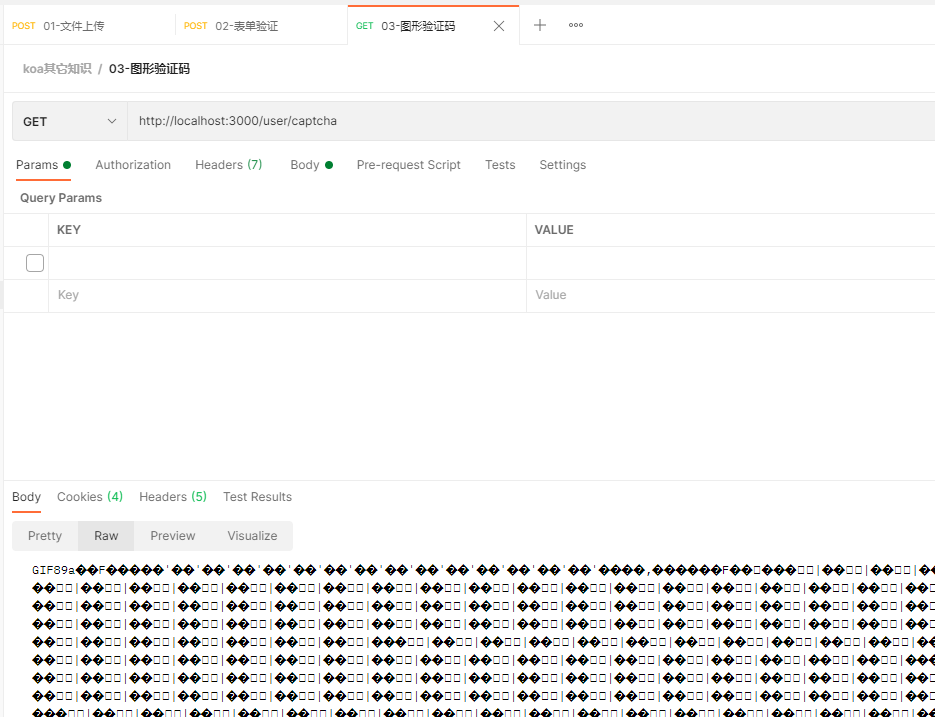
使用img标签,使用验证码如下:
<img src="http://localhost:3000/user/captcha" alt="">
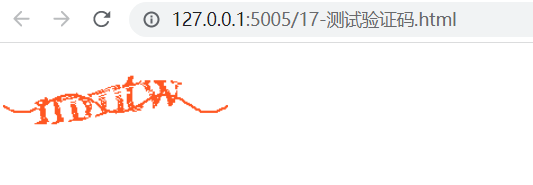
效果如下:
